Tech Post #10: What I Learned This Qaurter!

This quarter I have learned so much about atoms, circuits, power tools, and so much more. We have done a bunch of projects this year we have made

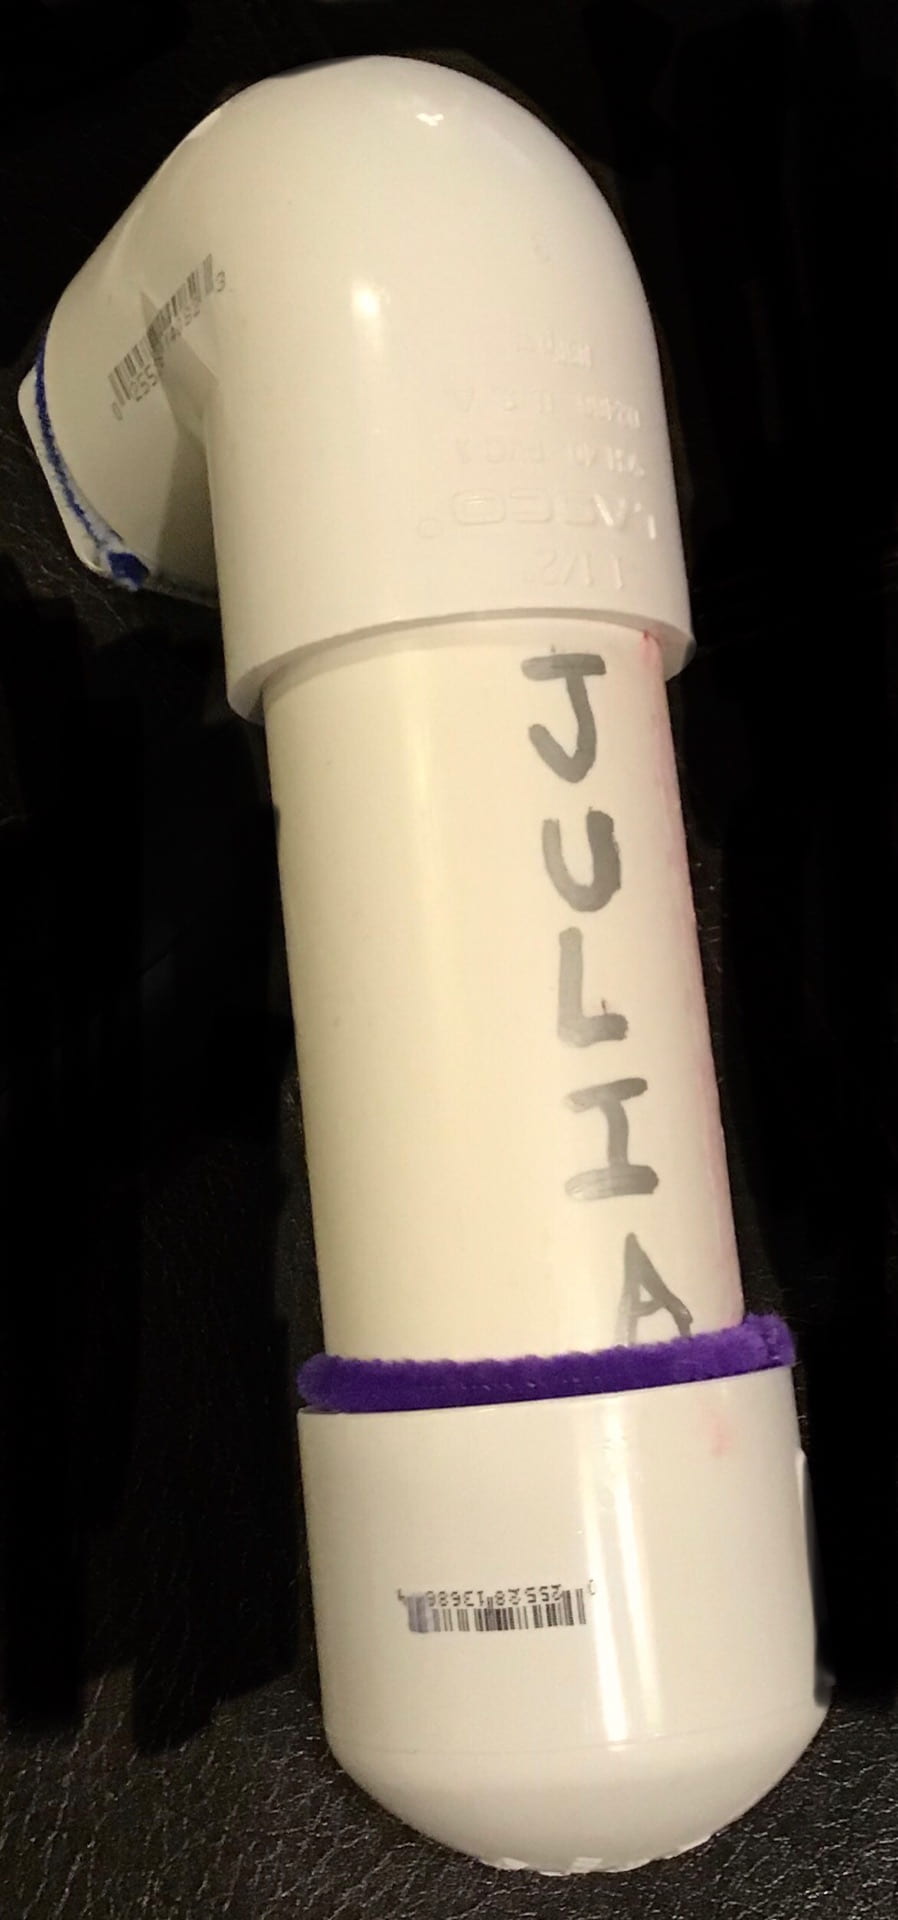
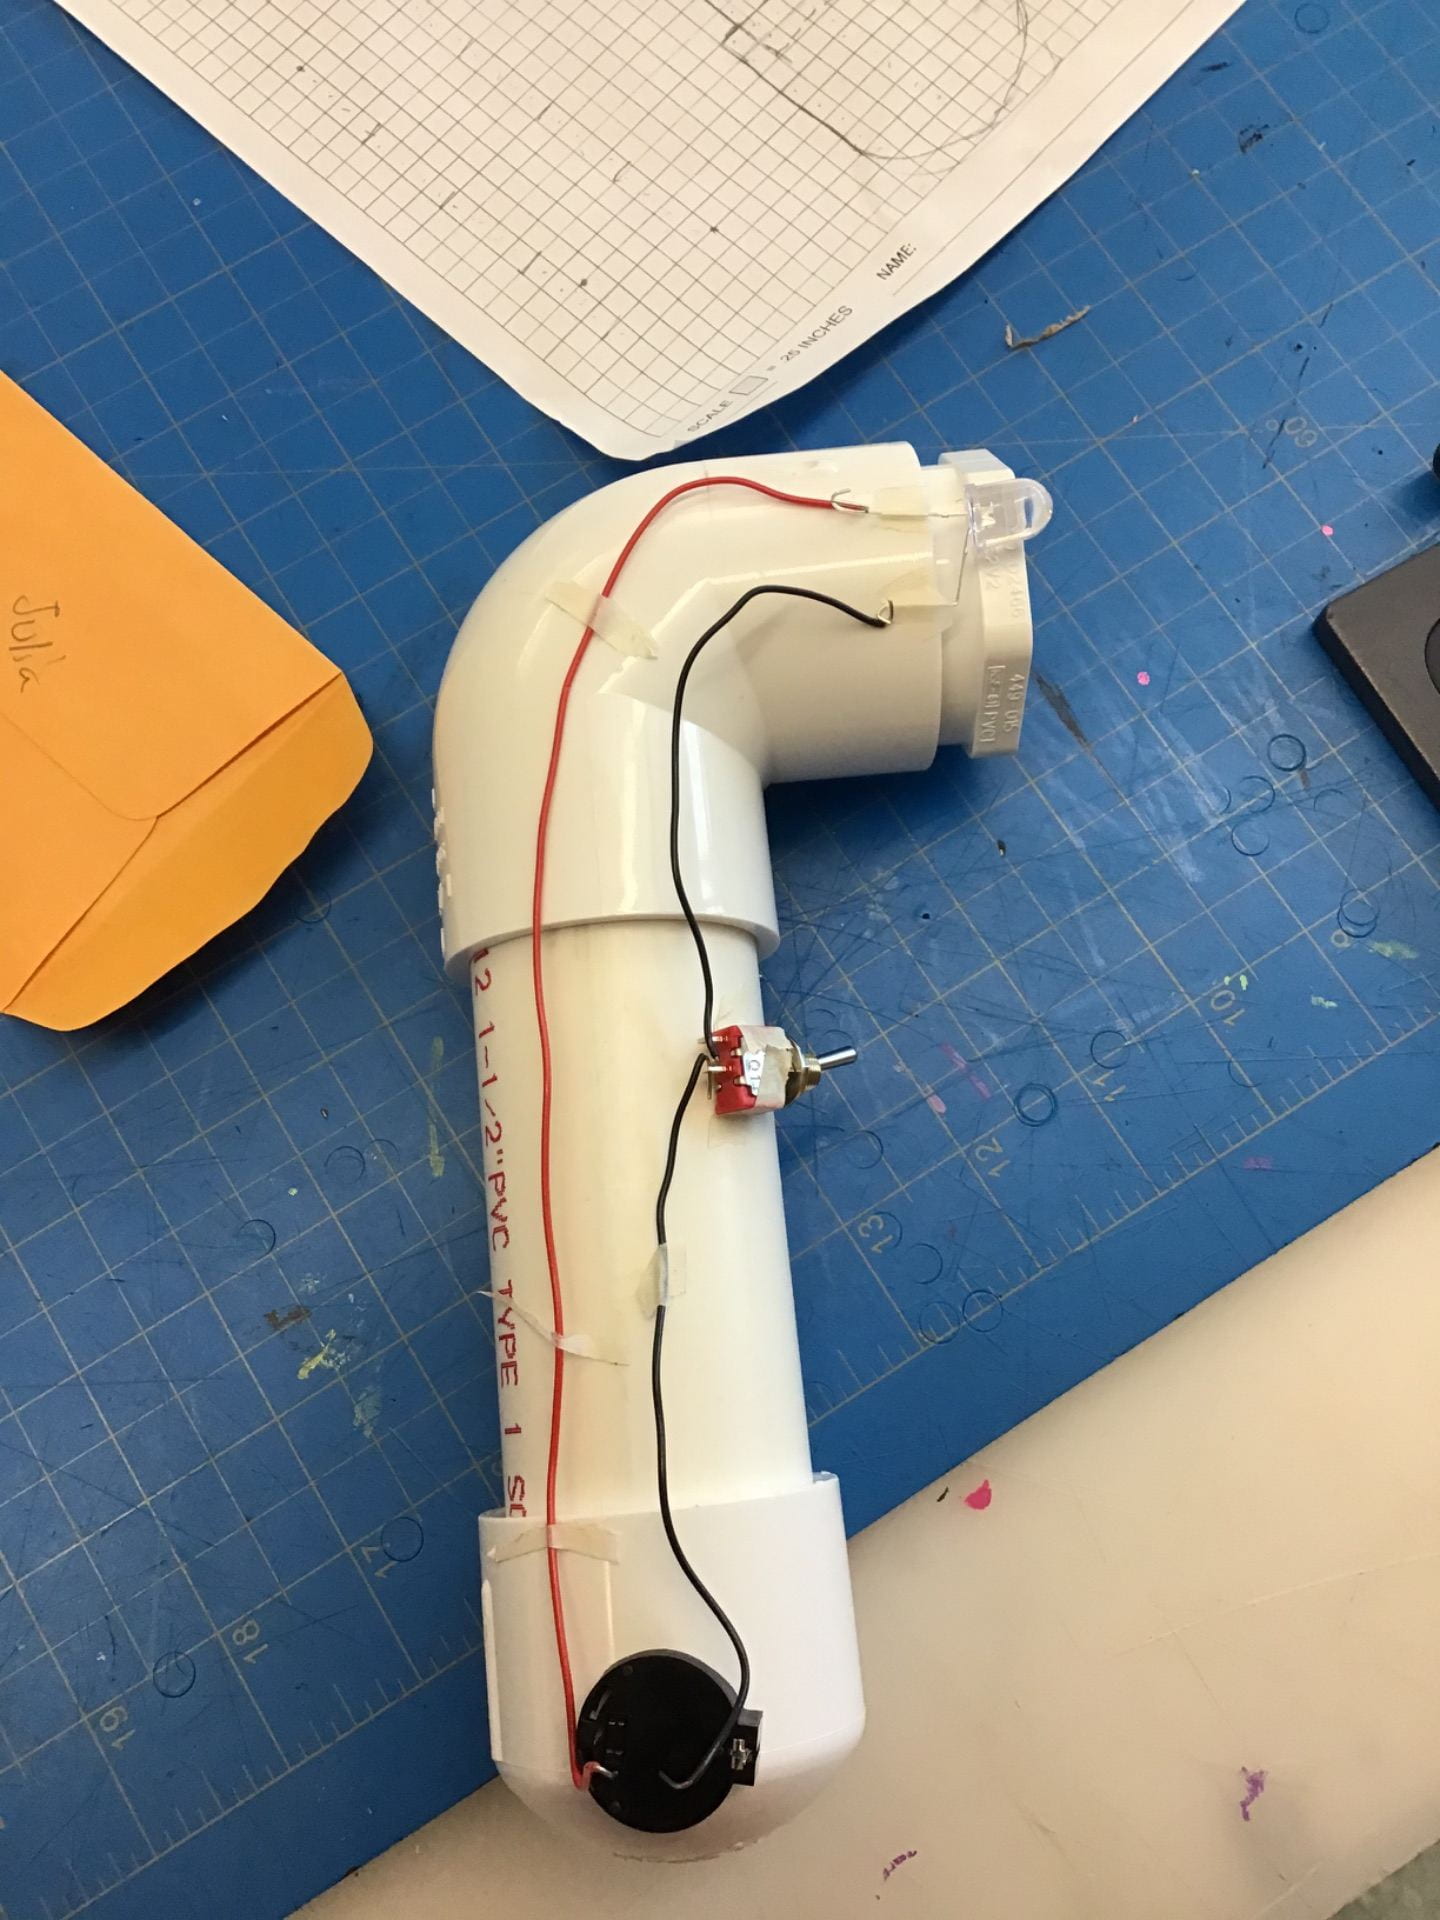
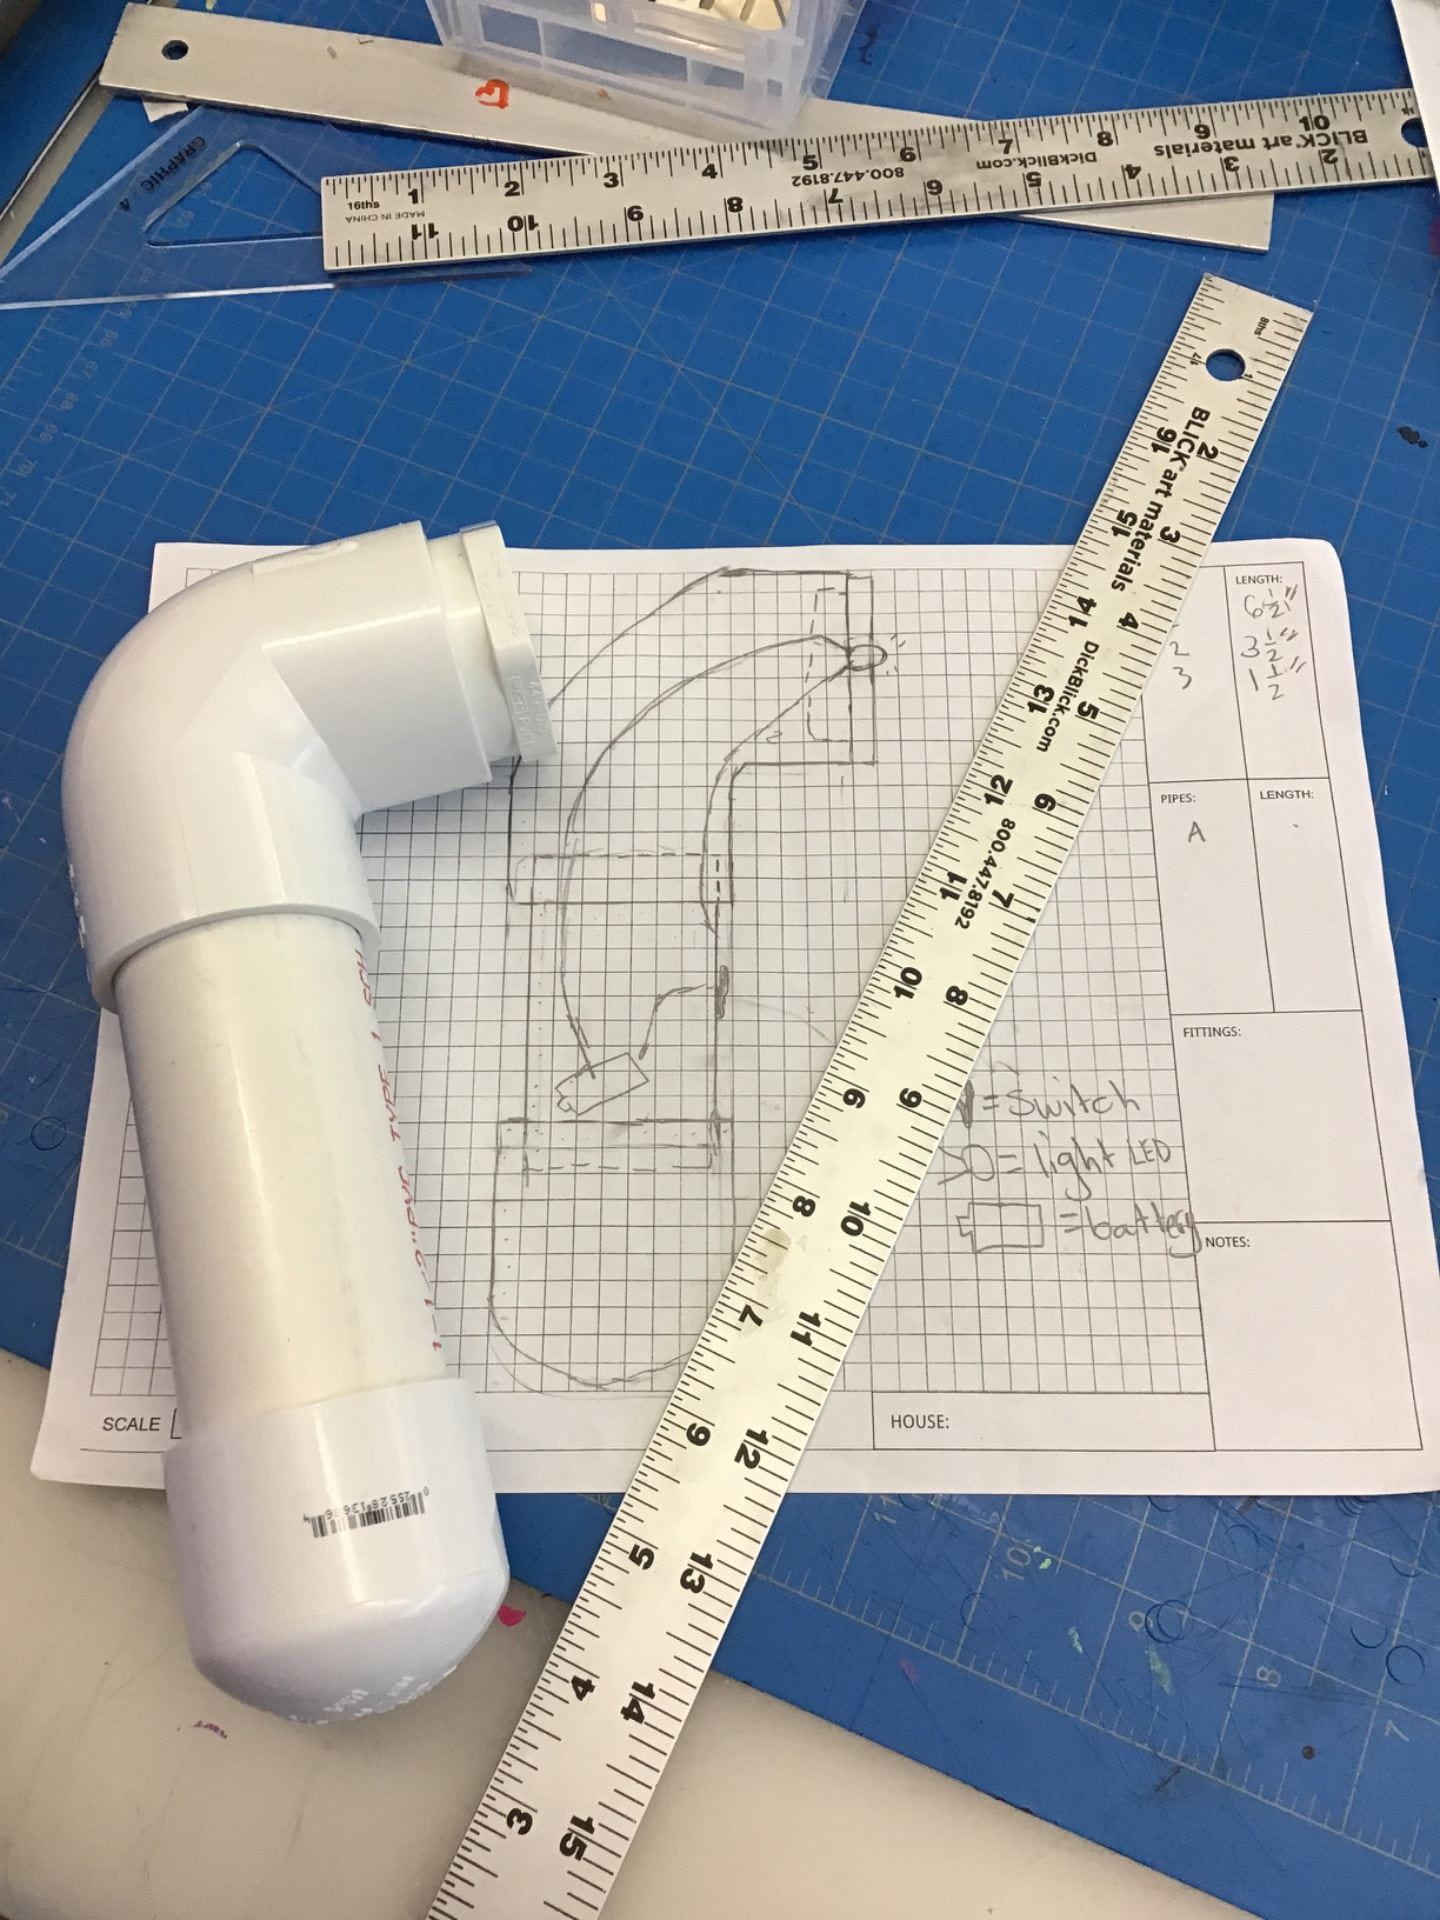
Flashlights, switches,  & necklace charms.

Before technology I vaguely knew how to make a simple circuit. After making switches and flashlights I now know how to make them and why they work.

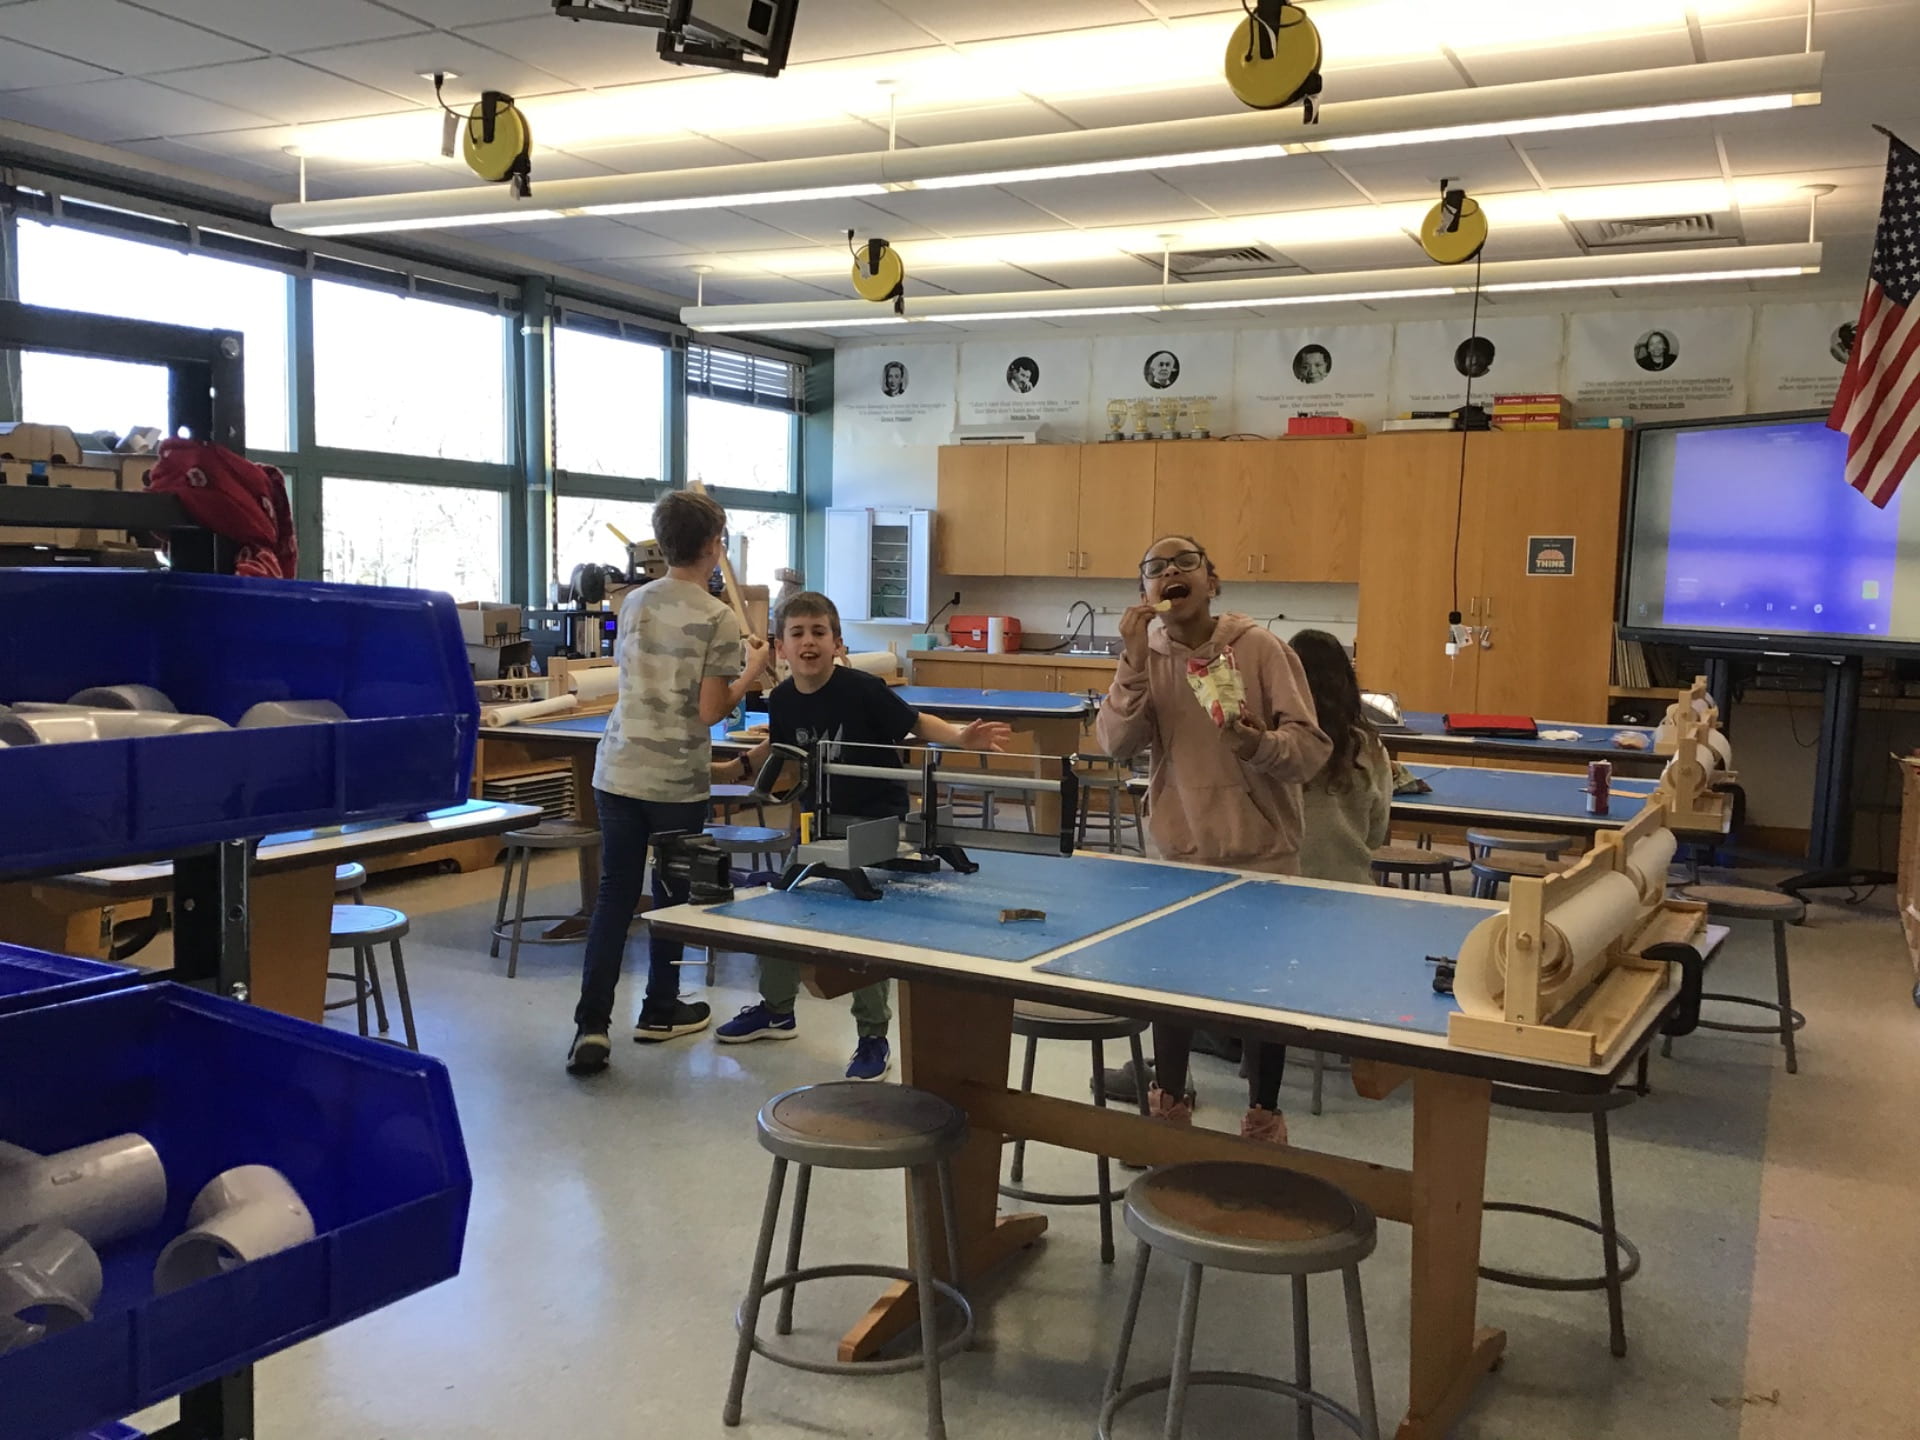
These photos are of two angles of the technology room, (and people ”posing” for the camera.) They  were taken during lunch recess, where my friends and I go for lunch to do fun crafts that we don’t get to do in class. 

In tech this year we used tools that I didn’t even know existed. We used drill presses, soldering  irons, and jigsaws. I’m not going to lie, l I was scared of all of them my first time using them, but after  using them once I was no longer scared, but I was cautious. I have had so much fun in tech this quarter and I’m sad that it ends soon. 😭😭😭

Tech Post # 9: Flashlight Decorating & The Finished Product!!

My flashlight in action!

This is a picture  and video of my switch completed! After putting the switch together I had the option to decorate.  We could use pretty much anything: markers, pompoms, or gems. At first I didn’t want to decorate it because I was worried that I would mess up, in the end I decided to decorate it very simply. I just put my name going down the side in big letters & I put some pipe cleaners on it. I am happy with how it turned out.  I am honestly really proud of myself, last quarter I saw my friend’s flashlight and never thought I could make anything like that. I am not going to say I had an easy time making this, it was definitely a challenge to make.  I had a lot  of obstacles along they way including an incorrect measurement, and a messed up circuit, but it was worth it.

Tech Post # 8: Soldering The Circuit

Switch video

That is a video of my circuit in action. In order to get the pieces to stick together we had to solder them together using a wire and a soldering iron which is INCREDIBLY hot! Soldering this was much harder than soldering charms (see post #3.) This time there was a specific process we used:

  1. Solder negative wire 1 to battery,
  2. Solder that wire to your switch
  3. Solder your other negative wire (#2) to the switch
  4. Solder negative wire #2 to the LED light
  5.  Solder your positive wire to the LED light
  6.  Solder your positive wire to your battery

You have a circuit!

I had a lot of trouble doing this, my first time I thought I melted the switch so I would have to de-solder the wires, but when Mr.Calvert came to give me a new switch he informed me that that was not problem. The real problem was that I had soldered the negative wire to the positive side of the LED and vise-versa! So to fix this problem I de-soldered the wires and soldered them to the correct sides.

Tech Post# 7: Flashlight Wiring


In order to get the flashlight working we needed wires. The first thing we did was draw the wires in our mechanical sketch. We had to keep in mind that the wires needed to be able to have a light, a switch, and the battery needed to be in a place where it could be switched. I chose to connect them so my light is at the top, my switch is in the middle, and my battery is at the bottom ( like how the picture is) After that we used special measuring wires to calculate how long our wires needed to be. After we figured it out we cut them with red and black wires, (one red; positive & two black; negative.)  When cutting our wires we made sure to add an inch to each wire so we could strip them. Stripping them takes off the conductivity blocker and makes it easier to solder them. After we stripped them we bent them. The reason we bended them was so we could hook them onto the piece we needed to solder it to.

Tech Post #6: Flashlight Shapes


We were building our flashlights we had certain shapes to work with. We had…

– 90˚ angle pipes, 45˚ angle pipes, double 90˚ angle pipes (two connected), round edged end pieces (bottom of the picture), end pieces with straight sides (top of the photo)

And lastly we could use a connecting piece, but we did not get it as easily. We had to measure the one drawn in our mechanical sketches and we had to measure it out on a large pipe and cut it with a saw. In this part I ran into a problem. I was able to fit it in the box that it had to fit in, but it didn’t fit on my page, at first it’s was no big deal, but as the steps got more complicated, it became more of a problem. Eventually I was able to solve the problem, but I spent mush more time on the steps than I had planned to.

Tech Post #5: Mechanical Drawing

  Mechanical drawing isn’t like regular drawing. It’s much harder and much more precise. When you are mechanical sketching something you need to make sure your being accurate. For example in this photo I used a 4” by 2” object, in order to figure that out I had to measure it. As you can probably tell by the photo that drawing is not drawn to size, but it is drawn to scale. Each one of those cubes is equal to 0.25 of an inch. Where it says 4” there are sixteen squares (4 x 4 = 16) and where it says 2” there are eight squares. (2×4=8) The reason we draw things to scale is so anyone can look at it and figure out exactly what you want.

Tech Post # 4: Switches

59769310574__9B31FCC6-9B4E-4576-B26F-EC153B4984CC 59769315064__8F1F8B20-3B7D-4295-B0BB-7D2C2BA025C6

This is a picture of my switch, and the link is to a video of my switch in action.

This week in tech we were making switches out of materials around the room. Mine is made of cardboard, tin foil, clothesline clips, aluminum foil, popsicle sticks, and rubber bands. How my switch worked is you would connect the clothes pins to  the cardboard in the center  and press down to the base. The reason this works is there is aluminum foil on the bottom of the square and the top of the base. We clipped 1 alligator clip to the base and 1 clip on the square these clips were also connected to a breadboard with an LED light. Because aluminum foil is conductive when the two pieces connected the circuit  was complete, turning the light on.

Tech Post #3: Soldering


This week in tech we started our soldering  unit. The first step was to think of ideas, but there was a catch, you could only use five wires. The next  step was to create a circle/ the frame. We had to wrap a wire around piece of wood, then twist the excess wire tightly and shape it into a wrapped circle. The circle was later used to string the charms on to the necklace. The next step was to cut the five wires and bend them into the shapes we wanted them. Then came the scarier part, In order to connect  the wires we had to solder. The soldering iron gets up to 842 degrees Fahrenheit. I was decently scared for this step, but in the end I just relaxed and was able to solder. I made the lighting bolt charm in the photo, but I didn’t make the J charm. Soldering is just using a hot iron to melt a smaller wire, when the wire melts it becomes like a glue to the charm letting you stick the pieces together, but DON’T TOUCH IT! Remember the iron is extremely hot.

Tech Post #2: Atoms


This week in tech we learned about atoms. In every atom there are electrons, neutrons, and protons.  The neutrons and protons are in the nucleus which  is located in the middle of the atom. The electrons are around the nucleus. As you can see in the diagram, protons have a positive charge, electrons have a negative charge and neutrons are neutral. If the amount of protons and electrons are even then the atoms charge is zero if there are more protons, the charge is positive, if there are more electrons, then the charge is negative. 

Tech Post #1: Breakout Edu

Yesterday in Tech we did the Breakout Edu challenge. How it worked was we got a box with three locks on it: a direction lock, a word lock & a number lock. The tables on my side of the room were  a team and the tables one the other side of the room were a team. We had to find items around the room and use them as clues to help us figure out what the combinations were. I think our team did a really good job with communication and cooperation. I think this because we were all cheering each other on when we did something  well. Also in the opposite, if someone didn’t have the right answer no one got upset with them. Over all, I think our group did a good job and that this activity was a great idea.