Blog post #8 flashlight project (pt 2)

Dear Mr. Calvert,

Hello, in this blog post I will be telling you about the flashlight project. I really enjoyed this project and I thought it was really cool. Anyways, after I finished brainstorming, cutting my wires, and cutting my connector, I decorated my flashlight. This was probably my favorite part of it! Then, I drilled the holes into my flashlight for the switch and lightbulb. After this came in my opinion the hardest part, soldering the pieces together! This took me two whole days!! Finally, I put the pieces inside my flashlight and it was done! Here is a picture.

Blog post #7 the flashlight project (pt 1)

Dear Mr. Calvert,

Hello, in this blog post I will be talking about the flashlight project. So far, I have brainstormed my design and wrote down the scale of it and also the wires that will be inside of it. My wires length are, 9 inches, 5 1/2 inches and 3 1/2 inches. My connector is 3 1/2 inches. The next step will be to cut the connector to the exact size and find the perfect size wires. I have kind of started that but I haven’t cut the connector or the wires yet. I will make a blog post in about a week continuing this one.

Blog post #6 the three switches game

Dear Mr. Calvert,

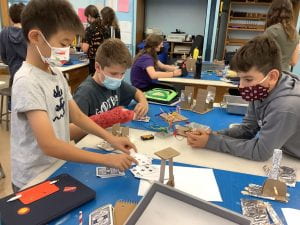
Hello, in this blog post I will be telling you about the three switches game. I thought that this game was really fun because we got to race each other and see who got through the whole deck of cards the fastest. I came in second place behind Eamon in my group but I still had a lot of fun. It was also super cool since we were playing a game with the switches that WE made. Anyways, I really liked this project and thought it was really fun.

Blog post #5 the three switches

Dear Mr. Calvert,

In this blog post, I will be telling you about my three switches. It was the last day that we were doing switches, and I had only one of them done! Thankfully, I had my other two switches planned out. I was next in line for the glue guns and I glued two pieces of cardboard that were parallel to each other on a cardboard. Then I placed another piece of cardboard on top of it but just before I was about to glue it, I realized that this wasn’t going to work. I started panicking and tried improvising on the spot and finally I came across another idea, maybe I could glue another cardboard piece in the middle and then move it from side to side. I decided that was going to be what I do. I quickly did that for my last two switches and then I was done right before it was time to clean up! I was relieved.

Blog post #4 the jewelry piece (pt 2)

Dear Mr. Calvert,

In this blog post, I will be continuing about the jewelry piece. Last time I left off I was talking about how I was creating my design and now I will be continuing that. After I finished making my design, I signed up for the soldering iron and waited in line. When it was finally my turn, I started soldering but my fin for the fish came off! I was a little bit disappointed, but I made a new fin and then continued. I was almost done with my whole thing and then the mouth of the fish also completely fell off and at this point I was thinking of doing my jewelry piece all over again. But I continued and made a new mouth, and in the end, it all worked out!

Tech post #3 The jewelry piece

Dear Mr. Calvert,

Hello, for this weeks blog post I will be talking about the jewelry piece. I chose to make this piece for my mom. On the brainstorming sheet I came across many ideas like, a tennis ball, a wave, a heart, and many more! But in the end, I decided to go with a fish. I had a couple of details on the fish like a fin, and I gave it a nice smile! Then, I made my jewelry frame, the first one that I made, was not very good, but by the second and third time, I really got the hang of it. I definitely could have made it even better and done it a couple of more times, but I felt satisfied with my result and chose to go with my third one. After that, I had to put the details on my frame and I am currently still on that step. I will have another blog post very soon continuing about the jewelry piece when I am completely finished with it!


From, Martin Mihaylov

Tech blog post #2 The size of the universe lesson

Dear Mr. Calvert,

Hello, for this weeks blog post I will be telling you about “the size of the universe” lesson. I really liked this lesson because it had a great combination of crazy facts and learning new things. This lesson was also very engaging and I think that everyone really enjoyed it. I know that I did. At the start, you told us that we would be amazed at how big the universe really is and I was like, ok, maybe the universe is pretty big. But after the lesson, I was truly astonished. Also, voyager one and two seemed really cool and I actually have looked a little more into them.

Tech post #1 What I am excited for in tech

Dear Mr. Calvert,

I am very excited for tech this year and in this blog post I will be telling you all about it. To start off, I really liked tech in elementary school and I love using computers, machines, and other things like these. I am excited to do it again this year. The machines in your room look very cool and I am looking forward to using them. The first couple of lessons have been very engaging and I learned so much from them! I especially liked the one about the universe and atoms. I knew that the universe was big, but not THAT big! Anyways, I am very excited to have tech this year.