Rube Goldberg Process:
A lot has changed since I did my first blog post and sketch about the Rube Goldberg machine. First of all, I was having problems with my sketch and build design, so my sister and I decided to combined and work together in our dining room. The dining room had a good, closed-in space with enough hard floor, and surfaces. This was perfect for our build.
The problems at first were building the first part of the build. We didn’t really know what to expect, and it was hard to figure out what would work. Natalie and I knew that we could incorporate many simple machines, especially pulleys. Some other simple machines we had were incline planes, wheel and axles, wedges, and one lever. We soon decided our simple machine would start with someone pulling a rope and our simple task ending by pouring water and food into cat bowls.
My success at first was getting materials. It turns out we had much more than we needed and we didn’t really need to buy much, besides a few pulleys and dominos. With a little help from my mom, we had already gotten more than halfway through the build on Saturday. We built it by testing each little section and making sure it works, then putting them together.
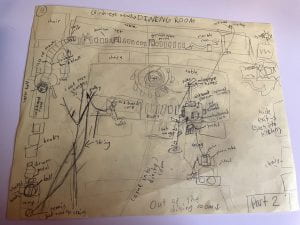
My first sketch was not very useful anymore so I decided to make a new one after we could scope out the new build design. I liked it way better than my first one, and it was laid out well. The next day we finished and tweaked up the build, and then we had to test it. When the build was finished, it had 16 steps in all, with more than 6 simple machines.
The problem afterward when we were testing was that we realized some things didn’t exactly work in the slightest way. At first, the bouncy balls going into a cardboard tube, in the beginning, got stuck, so we had to get smaller ones. Second, we had to re-do all the dominos with a spacer because it wasn’t spaced correctly. A lot of the angles were re-put and spaced out. When we got onto our 9th try we realized that in the ending when we added weight on one side of the pulley it made the other side not pull down. To fix this, we had to even out the weights by putting magnets on the cars, (The first side of the pulley,) and then taking away some food and water.
My successes were that it worked! In the end, we got it correct on our 10th try. We got many good recordings and explanations for our we-video in the future. Overall I had a great experience building and planning the Rube Goldberg. It was very fun and exciting and I learned a lot.


Here are my final sketches!
We-Video Process:
My We-video was a rushed and short, but complicated process. Natalie and I finished our Rube Goldberg shortly after we planned a way to put our videos, photos, sketches, and everything together cleanly. In the end I am very proud of what we have accomplished and done. It’s the end of the era!