Hello. This is the last post for passion projects. These are my final sketches and drawings, and I hope you like them!
Hello. This is the last post for passion projects. These are my final sketches and drawings, and I hope you like them!
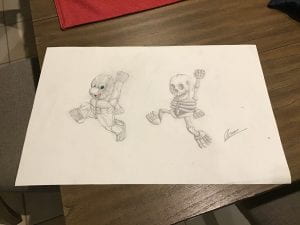
Hello everyone! These are pictures of my prototypes, which are sketches. Hope you like it!


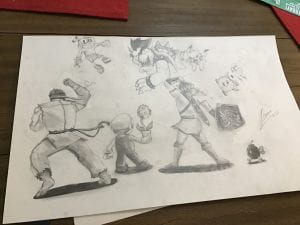
So, this is part three of my Passion Project Process. Since I have my pitch and I have everything I want to do written down, it’s time for planning my prototype and how my project is going to look like. If you haven’t read my last blog post, then you should read that to understand what I’m going to say. For the example sketches of the human body, I’m going to use just a regular sheet of sketching paper and a sketch pencil. I’m also going to show a sketch of Mario and his anatomy (it’s kind of weird). Like I said in my last blog post, I’m going to do an “epic” drawing using all the skills I’ve learned from this project, and I’ve decided that I’m going to do an epic piece of video game characters fighting, and if you’ve played Super Smash Bros, you know what I’m talking about.;) As soon as I’m finished with my sketches, I’m going to post them on my next pos thanks for reading! 😀
Hello. These are some questions about my Passion Project.
What will you learn and make?
I will learn how the human anatomy works and what muscles go where, what shadows go where, and what muscles should stretch in different dynamic poses. I will make multiple sketches of how the anatomy works for different characters, and I will make some drawings of different characters, and in the end, a drawing tutorial on character drawing using all of my best materials and new skills I will learn throughout this project.
Why do you want to learn and make this?
I want to learn and make this because I want to get better at drawing characters, and I also feel like it would help me when I try to draw more complex pieces including different characters.
How will you learn and make this?
I will learn and make this by asking my art teacher for my Honors art class, and I will ask her how the human anatomy works, and what muscles goes where on the human body. I will make my sketches with a charcoal pencil to define which muscles go where, and I will use Prismacolor colored pencils for my pictures of drawing, and my time lapse. I will make the video by attaching a camera to my lamp on my art desk, then I will start drawing.
What will success look like to you?
I will learn and make this by asking my art teacher for my Honors art class, and I will ask her how the human anatomy works, and what muscles goes where on the human body. I will make my sketches with a charcoal pencil to define which muscles go where, and I will use Prismacolor colored pencils for my pictures of drawing, and my time lapse. I will make the video by attaching a camera to my lamp on my art desk, and I will start drawing.
In Mr. Turner’s 6th grade science class, we get to make passion projects. Passion projects are really fun projects where you get to choose a passion of yours, and make a slideshow out of it and present it to your class. The first step, obviously, is to choose a passion. For me, I’ve always had a passion for art, and different forms of it. Watercolor, pastel, colored pencil, and acrylic are all types of art that I love to do, but I especially love to draw characters from my favorite TV shows and video games. And that is my passion, character art/drawing. The next step will be posted next Monday, and I have really high expectations for this project. I’m very excited about doing this, and even though I’ve already done a passion project in 4th grade, I still think it will be a fun experience and a fun project overall! 😀
So, today in science, we did messy science, where you get real materials and test stuff out with those materials. So, today we did just that. We got to mix 4 teaspoons of sugar with food dye, and we would have colored sugar in a cup. Then, we got three more cups and filled one with water, one with vinegar, and one with vegetable oil. Our task was to mix the solute with each of the solvents, and we had to make hypotheses on what would happen to each of the solvents if we mix the solute into it. 2/3 of the hypotheses that my science group and I made up were correct. For water, we correct. We guessed that the sugar would dissolve into the water, and would make the water green, and that was exactly what happened. For the vinegar, we were also correct. When we mixed the sugar and the vinegar, we got the same results of when we mixed the sugar and the water. For the oil, we were wrong. We guessed that the result would be the same as the water, but the process would take longer because oil is thicker than water, but instead what happened was the sugar just stayed at the bottom of the cup, and it didn’t dissolve at all. It didn’t even make the oil green! But this was a really fun project because we are supposed to learn that not all solutes can dissolve into a solvent. I would honestly do this project again! 😀
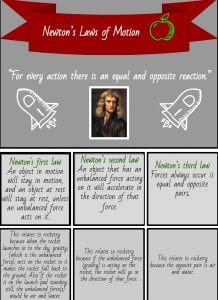
So, we made our own infographics on Isaac Newton’s 3 laws of physics. Honestly, I thought that this activity was very fun because we made it on a Google Drawing, and we were allowed to customize it any way we wanted to. Basically, we had to write out Isaac Newton’s 3 laws of physics, then write them in your own words. After, you could work on the design. You can add a quote, add pictures and what not. Anyways, this is my infographic. Enjoy!
So, we used Adobe Spark to make our own Instagram posts and slideshows about our Rube Goldberg projects and to advertise the Vivian Robert Youtube channel, which has all of the videos of the Rube Goldberg machines that we made. Honestly, I thought that using Adobe Spark was really fun because it’s just like Google Slideshows. One thing that I found neat was the ability to use icons of a lot of things, and even though I only used one icon in my Instagram Post and no icons on my slide show, I still think that they’re cool. All and all, I loved this project and I would be absolutely ecstatic to use this again!

So at this point, me and my partner have finished most of our project, and this is going to be my final blog post on the Rube Goldberg project. So I thought that this whole project was really fun and interesting because our task was to make a machine that could complete a simple task in the most complex way possible, and to me, it was hard but fun. Something I learned from this amazing experience is to be able to cooperate with someone to complete a task. This project also taught me more patience and obviously things about Rube Goldberg and his famous machine ideas. Continue reading Final Reflection (kinda) – Rube Goldberg
So, our most recent meeting, we started building (which I made a blog post on) and we changed our design and our task, and now we’re getting somewhere, but now, lets get to the main idea of this blog post, which is testing our design. So, when we first started to test our original design, it didn’t really work, so we changed some steps. But when the deadline was really tight, we got my partners mom to help us, and she was a really big help, and so we started to test our new design, which sometimes worked, and sometimes didn’t, and this happened because we had to get the perfect angle for the ramp of the first step. Continue reading Testing the design – Rube Goldberg