Rube Goldberg Blog Post #2

Rube Goldberg Blog Post #2

As I designed this Rube Goldberg machine, I had not foreseen as many problems as there happened to be. I knew some parts would probably cause problems, sure, but it simply didn’t occur to me I’d have to take out as many parts as I did. At least you could still see the similarities between my sketch and the actual thing.

Designing the Rube Goldberg contraption was never the problem – I probably had a thousand ideas of what to add in, at least half of them impossible. No, designing was easy. It was the building and collecting that were hard. Like I said, I hadn’t accounted for so many problems. So when those problems surfaced, I was unprepared for the sudden tidal wave. Because of this, I had no backups and simply didn’t know what to do. I was, although I’m ashamed to say it, ready to give up.

But just when I started to hang up my cap, a superhero called “Mom” (a strange name for a superhero, don’t you think?) came to the rescue, which is, of course, what superheroes are meant to do. Mom helped me see the problems from a different perspective, allowing me to fix most of my problems. Although, of course, that meant sacrificing my pulleys, seesaw, Jenga blocks… etc. Still, it worked, and my paper ball was in the trash (along with some balls, pieces of cardboard and other unwelcome items). 

There were certainly many lessons I learned, such as Don’t mope around and work on your projects or Don’t try and figure out fancy fonts for your We-Video and JUST GET IT DONE! You can see that the main point of focus was “don’t” rather than “do”. I’m afraid I must add yet another “don’t”, though, and that is Don’t give up. I was prepared to give up and Mom was as well (especially when I accidentally didn’t video it on the 6th try, which was our actual first attempt). Dad wasn’t really helping when he started telling us to video it, either. He only succeeded in making us more annoyed. Still, me and my mom supported each other, and we finally got through. So, just don’t give up

I probably spent about 2 hours on the video. Some of which was tinkering around with fonts and special effects. It had already gotten late by the time I finished, so I left the narration to the morning. I don’t know if I was supposed to do this or not, but I fitted all my narration for one image or video into 6 seconds. I wasn’t able to add any effects other than slow-mo and there were no transitions. If I’d gotten more time, then I’d probably fix up a few things, such as add a walk-through into my video or some type of effect. I know it said 3 to 5 minutes, but I had no way to stretch it, and I ended up just having it almost 2 minutes. Really, I was just grateful to have completed everything before the deadline.

I have said this for probably every unit I’ve done a reflection post on, but I have to admit, there’s not much else to say. So I’ll say it again: I’ve enjoyed it, really, but sometimes the deadlines get you stressed and I really wouldn’t want to do this again (maybe without deadlines, of my own accord and not having to worry about any specific rules). I think you’re probably getting bored of me saying that all the time. Maybe the next unit will be more exciting, or even worse than before. I just hope I will not have to type that one sentence once more.

Rube Goldberg Sketch

Rube Goldberg WeVideo
Rube Goldberg Blog Post #1

Rube Goldberg Blog Post 1

I’d created a sketch, but now I had to test it. Who knew if it would work or not? Even before I built it, though, I had to find materials and maybe revise some parts of the machine. So I wrote down a list of materials I’d need to find:

  1. Toy car
  2. Blocks
  3. Marbles
  4. Toy Seesaw
  5. Long and Short Cardboard Tube
  6. Cardboard Strips
  7. String
  8. Marker caps

We began the search around the house. I had no toy cars, so I decided to ask Cindy for one. She agreed. Blocks were slightly more difficult. However, we remembered that Legos were a good weight and could make different shapes. So that’s what we used. Then, we had to find marbles or some sort of small ball. Somehow, I’d forgotten about an old Chinese board game that had a lot of marbles. Next on the list was a toy seesaw, but to this day, we still don’t have it. I’ll probably make it out of some cardboard I had left. Speaking of cardboard, my mom had warned my dad about keeping cardboard tubes beforehand, so I used those. Then we needed cardboard strips, and we cut up some boxes. I was using string and some pulleys Mrs. Roberts gave me. Now it was time to assemble(without the seesaw). 

I decided the Rube Goldberg would be built in the dining room. It was relatively empty and not completely in the way of everyone else. A confusing part of building the contraption was that I couldn’t figure out how my sketch worked. It was designed vertically, so I’d have to use some sort of wall. Also because of that, I’d have to attach my parts to the wall, thus adding more materials to my list of to-finds. So, all-in-all, it was fun but challenging on some fronts.

Testing the machine was another story. It was annoying to have to set everything up again, to tilt the seesaw the right way and put up the Jenga blocks. And the marbles went everywhere! But it was still pretty fun, and while it was slightly exasperating, I could still find joy in it.

I haven’t needed to make revisions in anything, but I think that the Jenga blocks are a little too heavy. I may need to change it to something that can topple easier. One really frustrating thing was when something went wrong but it was hard to pinpoint what part went wrong, especially because I have a lot of materials. A challenging thing was knowing how to fix it (e.g. should it be bigger or smaller?). But in the end, I still managed to work most of the kinks out. I didn’t really have any “aha” moments. While I’ve done a lot, there are definitely some things to fix and smooth out, so I’m looking forward to when my Rube Goldberg will actually be done.

Maglev #2

This week we added more power. We did this by sticking 2 more bar magnets on top of the old ones. But since the old ones and the new ones repelled, we had to flip the bottom ones so it could stick. I thought there might be a problem, since wouldn’t the train just stick to the bottom magnet? Plus, it wouldn’t be just as powerful. In fact, it would be less powerful! But it did work, and we were happy. The placement of the strip magnets on the tracks was very common. Everybody used it the idea!

The first time, we failed. That’s because our train had South, and the train tracks were North. So it stuck. We fixed that by taking the train out, and then we switched sides. Now it was North to North, so it repelled and the train levitated! When we got it right, though, we needed to make the train fly higher. So, the way we improved it is that we added another 2 magnets to the track.

I learned a lot of things from this experience, from what a maglev is, to the EDP (Engineering Design Process). The EDP, in case you don’t know, goes like this: Ask, Imagine, Plan, Create, Improve. Working with groups is also something I learned. It told me teamwork is hard, but it pays off. Something else is that a maglev is a levitating vehicle that works with magnets. That’s what maglev stands for: Magnetic levitation.

Maglev #1

A maglev train is a train that levitates with the power of magnets. You have to attach magnets to the train’s bottom and the train tracks for it to work. My group thought we should use bar magnets and disc magnets.

Today, when we tried to make the train levitate, it worked on the second try. The first attempt left  train stuck to the tracks. The second levitated an inch from the tracks. My group and I decided we would try to put two strip magnets on the tracks, and then we would put disc magnets on the bottom of the train. We tried to do it, and it didn’t work at first. One of the train’s magnets were on a different side, so it attracted to the tracks. That’s why the first one did not work, because it stuck.

My group didn’t really pay attention in the first few minutes, but we pulled it together. We first cut the strip magnets. We measured it, and that was a bit hard. Then when we cut it, it was also hard, because the strip magnet was very hard. But when we set it up, it was easier than expected. We still struggled to make sure the magnets were on the right side, and that it repelled, but it still was easy.

Electromagnets

Today in class, we made electromagnets. Except these ones we didn’t wrap all the way around the bolt(with the wire). So, me and my science group used wire, a few paperclips, a bolt, a battery, and a battery holder.

We first wrapped the wire to a quarter of the bolt. Then, we attached the wire to the battery holder with the battery inside. We tried to get the paperclips to “stick” to the electromagnet. It didn’t stick. We recorded(wrote) what happened on a sheet of lined paper. After that, we wrapped the wire a little further down the bolt, around the middle. We tried to pick up the paperclips, but it didn’t work. Then we wrote our thoughts down. A little later, we wrapped the wire to a third of the bolt. We attempted to pick up the paperclips, and we succeeded! Then we  scribbled our words down. We finally wrapped it all the way to the end, where we found that it was much easier to pick the paperclips up. We were given sheets with questions on them.

If someone asked me,”What did you learn about electromagnets?” I would have answered,” I learned that electromagnets are not permanent, but temporary. That’s because you can disassemble them, or they might run out of power.”If someone also asks me”What questions do you have about magnets?” Then I would have said” How are magnets made? What are magnets made out of? Can a magnet be made out of ordinary metal?”This was a great opportunity for me to learn more about magnets.

Science with Magnets

Today in science we learned about magnets. I learned that the earth was the largest magnet in the universe. I also learned that gravity seems like a magnet because it pulls things down when they drop, but it isn’t one.

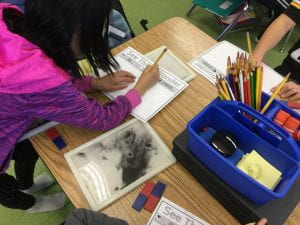
We also went around “stations” that were set up on our tables with our science group(our previous table).  The stations had magnets and “iron dust”. The magnets and dust were there for us to experiment with. We used See Think Wonder sheets to copy down our thoughts.

Then, while my group was at Table 1, it was clean-up time. Some people would clean, but others would still build and experiment with the magnets and dust. Over all, it was really fun.