Tech #9 – Designing my Flashlight

After I finished measuring the pipes, I started designing my flashlight. First, I though about what type of pipes to use in my flashlight. I decided to use a straight pipe, two connectors, a switch, and two round caps for the outside of the flashlight. For the inside of my flashlight, I have three wires, an LED light, and a battery. Then, I sketched my design on a separate piece of paper. I drew everything I wanted to use to make my flashlight in my sketch. After I did that, I started labeling each part of my flashlight.

Once that was finished, I drew my final sketch of my flashlight on graphing paper. The difference between this sketch and the one I did before is that I actually have to draw it to scale. By that I mean drawing the flashlight using the measurements. In the sketch, I had to draw the outside and inside of my flashlight. On the inside of my flashlight, I drew three wires, one battery, and one LED light. Since I’m finished with drawing my flashlight, my next step is to make the flashlight.

 

Tech #8 – Measuring Pipes

For the past few days, we’ve been working on measuring different types of pipes. We got a piece of paper that showed four different objects. Two were pipes, one was for connecting pipes, and one was for closing the open parts of the pipe. There were arrows going around each object. We had to put the measurements of the pipes where the arrows were. We measured the two pipes using a ruler, and wrote the measurements down next to the arrows. Then, we drew the pipes on graphing paper from scratch. For this part, we had to rely a lot on the piece of paper where we put all of the measurements for the pipes.

When you finish measuring the first pipe, you have to measure the second one. I repeated everything I did for the first pipe. I measured the pipe and drew the pipe on a separate piece of graphing paper. After you finish measuring and drawing the two pipes, you’re ready for sketching your design for your flashlight. I’m so happy that I finished the measurements and I’m so excited to start sketching my design for my flashlight.


Tech #7 – Flashlights

In tech, we discussed the story of the soccer team that got stuck in a cave. After we talked about that story, it lead us to our new project, which was to build a waterproof flashlight. I started brainstorming ideas for my flashlight. For my flashlight, I want to use pipes, connectors, a switch, and a light. A connector is something that connects the pipes together. I’m so excited to build my flashlight.

Tech #6 – Switches

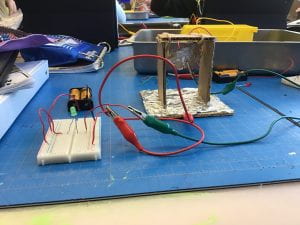
In tech, we built switches. The goal was to make a switch that lights up an LED light. For my switch, I used rubber bands, cardboard, and tinfoil. I used hot glue to stick everything together. The tinfoil was the most important part of the switch because that’s what would light up the LED light. When you touch the two pieces of tinfoil together, the LED light lights up. This was really fun to make.

Tech #5 – Soldering our Designs

I have finally finished my pendant. It took a lot of time and effort, but I’m very proud of myself for completing it. During my last blog post, I was still working on the design for my pendant. I designed it by bending metal wires to make it look like my design. After I finished doing that, I had to solder it together. I soldered it by using a soldering iron and a soldering wire. A soldering iron is an iron that’s very hot, and is used to connect the wires all together. A soldering wire is the wire that is melted by the soldering iron. The soldering wire acts like a glue that sticks all the wires together.

First, I cleaned my soldering iron. Then, I let the soldering iron touch the place where I wanted the wires to connect. I did that for ten seconds to heat up the soldering iron. Next, I got my soldering wire and put it in between the two wires I wanted to connect. After that, I put the soldering iron right on top of the soldering wire, which made the soldering wire melt. After a few seconds, the melted wire hardened. I repeated these steps until all of my pieces were connected. When the pendant cools down, I carefully removed the pendant from the piece of tape it was on. After that step, I was finally finished with my pendant. My pendant didn’t come out perfect, but this was so fun to do and I hope I get a chance to do it again.

Tech #4 – Pendant Designing

In tech, we started working on our actual designs fro our pendants. Before we started making the pendants, we had to brainstorm designs on paper. The design that we chose is supposed to act as a guide. You make the design with metal wires by using a special type of tape and you stick it on top of your design. Next, you peel off the other side of the tape and stick the pendant onto it. Then, start making the design for you pendant.

For the pendant design, you get a metal wire and start shaping the wire so it eventually looks like the design you made. When you have the pieces of your design, you’re supposed to stick it on the tape where the inside of the pendant is. When the pendant is complete, you solder all the pieces together. I’m not up to that part yet, but I’m still on the designing part. This is really fun and I’m so excited to solder all of the pieces together.

Tech #3 – Soldering

For the past few days, we’ve been working on something called soldering. Soldering is a process when two or more items are attached by melting the items together. In this case, we’re using metal wires. In class, we are working on making pendants.

The first step was to brainstorm a couple of ideas for our pendant design. It was a little hard because we were only allowed to use five metal wires for our design. Then, we had to pick one design to use for our pendants. After a lot of thinking, I finally settled on one design. After we decided on which design we were going to do on the pendant, we had to make the outside of the pendant, but not the actual design yet.

We made the outside of the pendant by starting in the middle of the wire and wrapping the wire around the wooden stick, which would turn the wire into a circle. The reason why we started wrapping the wire in the middle is because we needed the two sides of the wire to tighten the circle. We had to twist the two wires three times, and when the outside of the pendant was tight enough, the outside of the pendant was complete. This was really fun and I’m so excited to make the actual design.

Tech #2 – Atoms

For the past few days in tech, we’ve been learning about atoms. Atoms are submicroscopic particles that make up everything. Atoms are made up of neutrons, protons, and electrons. We did an experiment that shows how electrons are attracted to protons. The materials I used were PVC pipes, wool cloth, and a glass jar. Inside the glass jar were two pieces of aluminum foil attached to a metal hook, and on top of the jar was a metal antenna.

In this experiment, I rubbed the wool cloth and the PVC pipe together. When I was doing that, I heard something that sounded like electricity, and that sound was actually static electricity. Once I finished doing rubbing them together, I moved the PVC pipe until it was touching the metal antenna. Inside the jar, the two pieces of aluminum foil moved away from each other.

Electrons are negatives, and negatives repel other negatives, which is why the two pieces of foil moved away from each other. While I was rubbing the wool cloth and the PVC pipe, the wool’s electrons got transferred to the pipe, and when the pipe touched the antenna, the electrons traveled down to the foil. Since all the electrons traveled down to the foil, they moved apart because a negative and a negative don’t attract. This experiment was really fun and I learned so much from it.

Tech #1 – Breakout

Ever since the first day of 6th grade tech, we reviewed twelve safety rules that is needed in tech. We did an activity called “Breakout” that has to do with the twelve safety rules. First, the entire class got split up into two groups. The goal of this game is to unlock a box filled with safety glasses. The box is unlocked when all of the locks have been unlocked. Luckily, each team had two hints for how to unlock the box. The challenging part of this game is that we were timed, and if the timer went off before we opened the box, then we would lose the game. We did’t know what the codes of each lock were, so we had to find clues hidden around the tech room that would lead us to the codes of all of the locks. There was also a bonus box, and the object inside the box is another clue.

My team started off really well. We found all of the clues in less than 15 minutes, but we were starting to run out of ideas for how to actually open the box. We asked our technology teacher for a clue. After that, we opened a lock. After we unlocked the first lock, we payed attention to all of the details on the clues. Since we payed attention to the details more, we unlocked a lock, and then another. Soon, we unlocked all of the boxes and won the game. This game was really fun and it was a great experience to have.

Capstone #7

After a lot of time and effort put in to my capstone I have finally finished! My class and I had to practice speaking to an amount of people before we do the actual presentation in front of other parents.

We did that by presenting our capstones to kindergarten and second grade classes, but first I had to present in front of my class. At first, it was very nerve-racking, because I had no idea when I would mess up, or if I might forget my script because I didn’t have my script in my hands. But the second time I presented in front of my class, I felt like I really knew what I was doing and knew the script by heart. When I presented to the kindergarteners and the second graders I started to feel more comfortable.

We also had to be filmed in front of the camera, and that made me just a little bit nervous, and I made a little mistake, but overall it was fine. Lastly, I presented in front of other parents, and I think all that practice really helped me control my pace, and help me memorize it even more, because it went really well.

It is such a relief that capstone is finally over, but even though it was challenging, it was also very fun and a great experience to have!

This is my final presentation, and I hope you like it and learn something new: