Making Switches – Tech Post #6
I recently finished soldering my pendant, and it turned out really well! The soldering was probably the best part of the project.
So maybe it doesn’t look like something you would get from a jewelry shop, but it’s cool! It’s homemade! And it’s personalized, too. Plus, it was completely free-of-charge. So that’s a bonus!
Anyhow, today in class, we began to make our switches. They require the ability to power a tiny LED light.
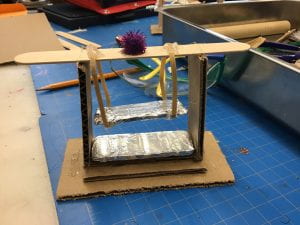
I began by designing my switch on a piece of graph paper. My switch would be, in two words, swing-like. Imagine this: a rectangle of cardboard covered in aluminum foil hanging from two rubber bands glued to a popsicle stick. The aluminum-foil cardboard hangs above another piece of cardboard covered in aluminum foil.
Yeah, my design is really confusing. Too confusing to understand. I’ll just leave a photo of the completed switch below, that way, you know what it’s going to end up looking like. There it is! Cool, huh?
 Once I completed my switch design, I began cutting the cardboard I needed with one of the machines. You had to keep your fingers pretty close to the blade while it was cutting, or else the cut would be uneven and sloppy.
Most people were afraid of getting their fingers near the blade, but in my opinion, it was pretty cool!
After I finished preparing my cardboard, I hot glued the pieces together and wrapped aluminum around certain pieces. Next, I hot glued everything together. Yes, lots of cardboard and hot glue.
The next day, we tested out our designs. And do you know what? IT WORKED! My switch was a complete success! I have to admit, it was pretty exciting.
Anyways, I feel like I’ve said enough. See you on the next post! 🙂
