This week in technology we built our own cranks out of paper. The paper was provided by a packet along with instructions on how to make the crank. The rest of the materials needed to assemble the crank were glue, ruler, scissors, tape, and a tiny exacto knife (the scissors, exacto knife, and ruler were for cutting the shaped out of the packet).
Before I show you how my crank turned out here is a photo of a type of crank for reference

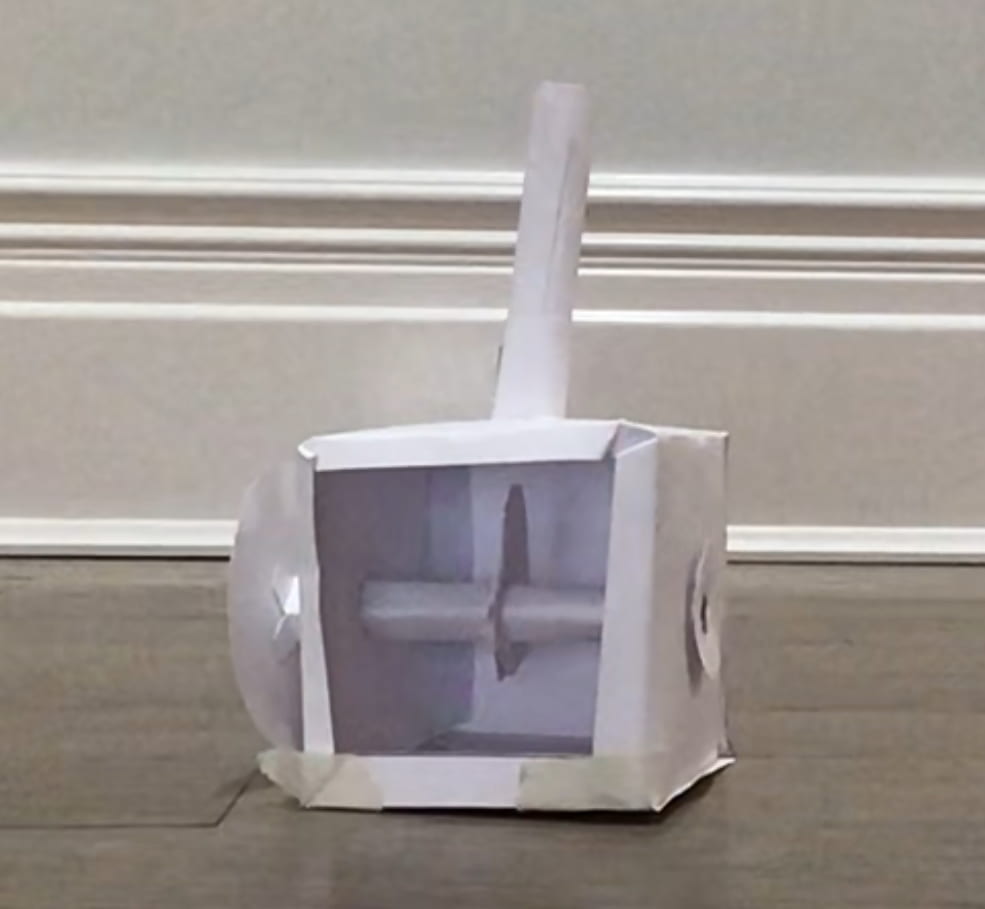
Now here is the one I made out of paper
As you can see inside the cube shape that I built is a gear that is attached to a handle on the side. The handle is supposed to make the gear be able to rotate. As you can also see mine has a lot of tape on it to keep it together, it also has a lot of glue but you can’t see that. The problem with my crank was that it was too fragile. The gear wouldn’t fully rotate without hitting what I called “road bumps”, I meant road bumps as in little stops where I thought the whole thing would just collapse. When turning, I had to be really careful because it was so fragile I was afraid it would break. I think the reason for this is when I was making the gear I probably didn’t put enough tape on it or stick it into the cube as good as I should have so if I were ever to make another crank, I would definitely improve on that. But ultimately, I think it’s pretty good for the first try and it was better then I expected, after all I was surprised it could even move. I’m still proud of it though, and I had fun making it!
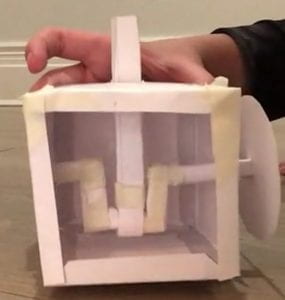
This week in tech we built our first automata’s. We are learning about cams so we all got to build our own cams with materials from a packet. All the paper, cutouts, and instructions were provided by the packet, but to build the cam includes a ruler (for bending the paper and cutouts), glue (for gluing them together to make a shape), and of course, scissors and a tiny exacto knife for cutting things out. After following no the directions and assembling the cam I ended up with this.

For this assignment I needed the axel (the thing in the middle of the cube) to be able to spin and the shaft (the thing at the top of the cube) to be able to be pushed down into the cube. For the axel; the way that I made it spin is connecting it to the bug circle on the outside and using that to make it spin. But to do that meant that there wasn’t a lot of room for the shaft to go down. So I think next time I will work on figuring that out and creating more space. As for how far it could move, the shaft was attached to a hole at the top of the cube with no glue so it could move. As for the rest of the structure I used rectangular, circular, and all kinds of other shapes and bent them, glued them, or folded them together to get a cube. The initial cube shape though was included with the packet but not a cube just a flat sheet of outlined paper to be folded into one, and this cube also included the holes on the sides and the top for the axel and shaft. Overall I think that the cam is a little messy, but its fine for the first try. If I were to do it again I would improve my folds and my sloppy cuts to make a better shape for the cube and like I said fine more space for the shaft. I liked doing this project and it was fun learning about and making the cam mechanism.