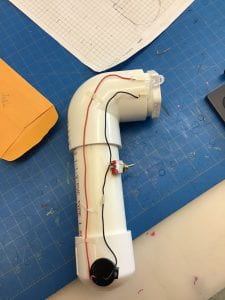
 In order to get the flashlight working we needed wires. The first thing we did was draw the wires in our mechanical sketch. We had to keep in mind that the wires needed to be able to have a light, a switch, and the battery needed to be in a place where it could be switched. I chose to connect them so my light is at the top, my switch is in the middle, and my battery is at the bottom ( like how the picture is) After that we used special measuring wires to calculate how long our wires needed to be. After we figured it out we cut them with red and black wires, (one red; positive & two black; negative.) When cutting our wires we made sure to add an inch to each wire so we could strip them. Stripping them takes off the conductivity blocker and makes it easier to solder them. After we stripped them we bent them. The reason we bended them was so we could hook them onto the piece we needed to solder it to.
