We are doing a project about Colonial America. 8 people in each colony. There are 3 colonies. Each person in a colony has a role/job. From blacksmith to plantation owner. After we figure out more about our jobs and relationships we are going to “build” a colony out of cardboard. The colonies were… Southern, Middle, and New England. We made charters and maps already. Our teacher doesn’t help us much so we can do this on our own. She throws obstacles like hurricanes or native attacks and we have to solve it. Group work is going to be hard because a lot of people won’t back down on their idea.
Tag Archives: group work
Blog Post #1 Plants Post
Blog Post #1 Plants Post
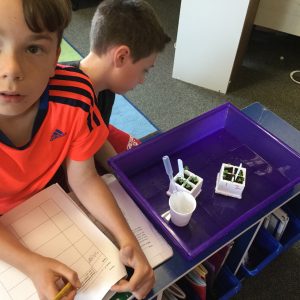
We started a plant unit a few weeks ago… When we started we had to put the wicks in the styrofoam quads to make sure that our plants don’t die during the weekend. First, then we put in a quarter of soil in each cell, after we put in the fertilizer which helps it grow and then covered it with soil and put in the seeds and covered those with soil again. We manipulated the water into 1 drop only. My question is what if we only use 1 drop of water on our manipulated plant? My hypothesis is If I only use a drop of water on my manipulated plant then the plant won’t be as tall because it won’t have enough water.
The color of most of our plants are green. We have many buds for the last 2 weeks. On May 17th the tallest plant was 3 cm. The smallest plant was 1 cm. At first ours was the tallest out of our class, I was really proud about that. Today, June 4th our tallest was cell 1 manipulated, 15 ½ cm!! It grew so much over the weeks. The smallest was cell 2 controlled, 7 ½ cm. It grew a lot too. Cell 1 manipulated grew 13 ½ cm over the weeks altogether!! Cell 1 controlled grew 8 cm altogether! I think that over the time that we measured the plants they grew so much! I am so happy we did this science project.
Maglev Post #3 (The Final One)
Our first track design was the track used 11 magnets, 3 strip. 8 rings. For our vehicle we used 7 Magnets altogether. 2 strip magnets and 5 ring magnets. 2 on the edges and the 5 ring magnets in between.
One of our problems was our vehicle keep on tilting to both sides, back and forth. So we had to align our magnets to one centimeter away from the edge of the paper. So we did that a centimeter away form the edge of the paper for the track and vehicle so it would be equal and not tilt. Another problem was that the disk magnets did not work at all. We tried and it didn’t levitate as high as the final and second one.
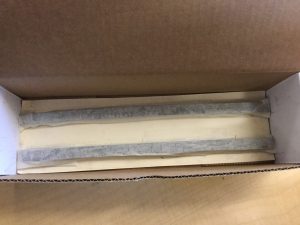
Our final design was simple it had 2 magnets on each edge. On the vehicle it had 1 magnet on both edges like the track. But only with 2 strip magnets altogether on the vehicle. Altogether strip magnets on the track was 4. So in all we had 6 strip magnets for our final design.
Our thoughts and feelings were basic. We were sad/mad when I tried putting ring magnets on top of the vehicle, I thought it would levitate higher. We were happy when it all aligned right. It was surprising for me because I thought the second time we did the maglev train (Maglev Post #2) was kind of better than this time to be honest.
This is a birds eye view, google drawing for our maglev train.


