Designing and Building Rocket #2

After we had launched our first rocket we had moved on to building and designing our second rocket. To design it we copy and pasted our first rocket design onto a new google drawing. The rule was, we could only change one thing on our rocket. Not two or three because then we wouldn’t know what failed. My group decided to change the fins because one of the groups that went the highest had skinny, and tall, fins. So we did the same thing almost to improve our rocket. After we had changed our fins we changed up the color too. Our rocket body was skinny, the nose cone was point and small, and the fins were thin, and tall. 

Building our rocket was so much easier than building the first rocket, because we had already built a rocket we knew what to do to build our second rocket. It was easy this time. We folded up the paper to make our body, though that did take a few tries only because we kept on letting go of the paper and kept unrolling. Other than that it was pretty easy to build the rocket. The nose cone was super easy to make. I made it. I had to put tape all around it too but that was easy for me. The fins everyone else took care of because I was doing the nose cone. After we had got everything on we were set and good for our next launch.

With my group everyone was agreeing on everything. It turned out to be good and in the beginning I thought the group could never get along but after the first launch, we all had a better bond. Though while designing we did argue rarely about colors of the rocket, how big and small fins were, and deciding what the one thing would be that we’d change from the first rocket. But after all, I’m happy with my group. 

Launching and Graphing Rocket #1

A day after we had finished designing and building our rockets our teacher told us we would launch the next day. Everyone was so excited for our first launch! My team could not wait for the launch!

For our launch there were jobs. One job was launching and placing the rocket, another was countdown master and rocket retriever, and the last two jobs were air pumpers. For our first launch how we decided jobs was we picked out of paper in a cup. We all put our names in and we picked out one name. That one name got to pick what they wanted their job to be first. My name got picked second and I picked rocket launcher and placer. 

The day of the rocket launch we went out to the field and everyone gathered around to listen to the instructions. My team went last because we are the last team, team 6. When one team went there were four clinometer readers and they would split into two groups and one would go to the back field and one would to the blacktop. Then when the team launches the readers get into action and they use the clinometer to read how high it goes. Our team’s rocket went pretty high! It went 118 Feet high! Wasn’t as high as the other teams but we are still proud of how high it went. I think it was a very successful launch as I thought it would be a big fail. Nothing fell so I was very happy about that!

Everything was good with the collaboration, and I think we all got along much. Sometimes we had arguments but not very much. It was rare if we had an argument.  I think after launch #1 our relationships with each other got stronger and better.


Blog Post #3 Plants Post


We pollinated the plant on Wednesday last week. We pollinated it about 5 times already.  When we pollinated the plant did nothing but a few days later… There were seed pods!!! The change of the plant wasn’t very big but it was exciting. The only change was the seed pods but we have 3 of them! When our teacher pointed it out we were super duper excited! Awesome right? One of them is big now. Not as huge as an actual seed pod but big.


The biggest manipulated this week was cell 1, 17 cm. The smallest manipulated is cell 10 cm. They look not so big, but when you measure it it is real big it would be probably the same height as a colored pencil. The colors of the plant are yellow for the flower and green for the stem and leaves. Most flowers are dead I don’t really know why but it started a few weeks ago. We are pretty sad about that.


Next week I predict that we will have a huge seed pod! Hopefully bigger then our gardens. I think more plants are going to die this week, especially our manipulated because it’s only getting a drop of water a day. Next I think more flowers are going to bud too and more seed pods.

Blog Post #1 Plants Post

Blog Post #1 Plants Post


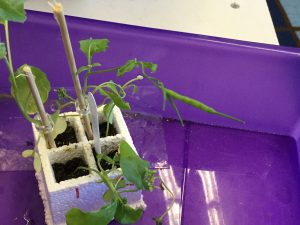
We started a plant unit a few weeks ago… When we started we had to put the wicks in the styrofoam quads to make sure that our plants don’t die during the weekend.  First, then we put in a quarter of soil in each cell, after we put in the fertilizer which helps it grow and then covered it with soil and put in the seeds and covered those with soil again. We manipulated the water into 1 drop only. My question is what if we only use 1 drop of water on our manipulated plant?  My hypothesis is If I only use a drop of water on my manipulated plant then the plant won’t be as tall because it won’t have enough water.


The color of most of our plants are green. We have many buds for the last 2 weeks. On May 17th the tallest plant was 3 cm. The smallest plant was 1 cm. At first ours was the tallest out of our class, I was really proud about that. Today, June 4th our tallest was cell 1 manipulated, 15 ½ cm!! It grew so much over the weeks. The smallest was cell 2 controlled, 7 ½ cm. It grew a lot too. Cell 1 manipulated grew 13 ½ cm over the weeks altogether!! Cell 1 controlled grew 8 cm altogether! I think that over the time that we measured the plants they grew so much! I am so happy we did this science project.

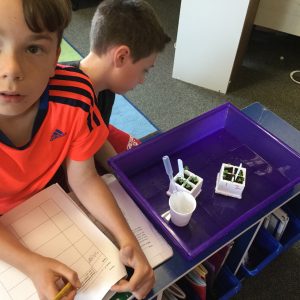
This is our group observing our plants.

Maglev Post #3 (The Final One)

Our first track design was the track used 11 magnets, 3 strip. 8 rings. For our vehicle we used 7 Magnets altogether. 2 strip magnets and 5 ring magnets. 2 on the edges and the 5 ring magnets in between.

This is our first group design.


One of our problems was our vehicle keep on tilting to both sides, back and forth. So we had to align our magnets to one centimeter away from the edge of the paper. So we did that a centimeter away form the edge of the paper for the track and vehicle so it would be equal and not tilt. Another problem was that the disk magnets did not work at all. We tried and it didn’t levitate as high as the final and second one.


Our final design was simple it had 2 magnets on each edge. On the vehicle it had 1 magnet on both edges like the track. But only with 2 strip magnets altogether on the vehicle. Altogether strip magnets on the track was 4. So in all we had 6 strip magnets for our final design.

This is our train, the 2 strip magnets on each edge.

This is our final track design. We had to fix this the most.

Our thoughts and feelings were basic. We were sad/mad when I tried putting ring magnets on top of the vehicle, I thought it would levitate higher. We were happy when it all aligned right. It was surprising for me because I thought the second time we did the maglev train (Maglev Post #2) was kind of better than this time to be honest.

This is a birds eye view, google drawing for our maglev train.

Maglev Post #2

We did a lot of things that worked including we only used strip magnets because the discs didn’t work as well.  We put 1 magnet on each side like a normal train track, but no magnets in the middle. We had to keep on putting more magnets on top of each other. On the train we only put 1 magnet on each side and not 2 or 3 on each side because it would be to heavy.


We didn’t fail a lot, yesterday we didn’t have anything good so we restarted. Then first try we thought of something good. We learned that we needed more magnets to make it be more stable.The changes that we made was that we should put more magnets on the track since we had all together on the track, 2 magnets. So we upgraded to have 3 stip magnets on each side of the track.


Our goal is to move into the improve phase by putting more passengers in the cup and if it falls then we will upgrade the track again, until we have about 20 – 30 rocks that stay on. 


This my group and I doing the 1 strip magnets on each side altogether 2 strip magnets.


We were very hard working. We were very proud after this worked.


Maglev Train Post #1

A Maglev train is a magnetic levitating train, it is levitating from magnets on the train and track. That’s why it’s called a Maglev train. On the train bottom of our design, there are 2 strips on the top and bottom of the bottom of the train, there are 5 magnets in the middle too. On the track there are 3 strips on on the middle on on top and one on the bottom. There 8 ring magnets altogether. 4 magnets in between each strip magnet.


Nothing worked, and part of our track failed. The train magnets would attract to the track magnets and tip over and attract to the side of the magnet. Also we had to keep taking the tape off and keep putting it on. It was pretty confusing.


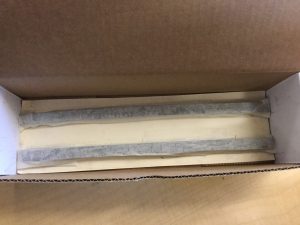
The experience wasn’t very good, though we got inspired by other groups that had a success. We tried and tried, It wasn’t successful still. It was really challenging there were tape scraps everywhere. Before we had started we taped down the track, so our arms were crunched in the box when we all tried to work on the track taping down the magnets. The The experience with my group was fine, it was kinda hard because there were only 2 jobs, track and train. But we helped each other so it was fine.

This is our group design, but we changed it so it would work.