Rube Goldberg Blog Post #1

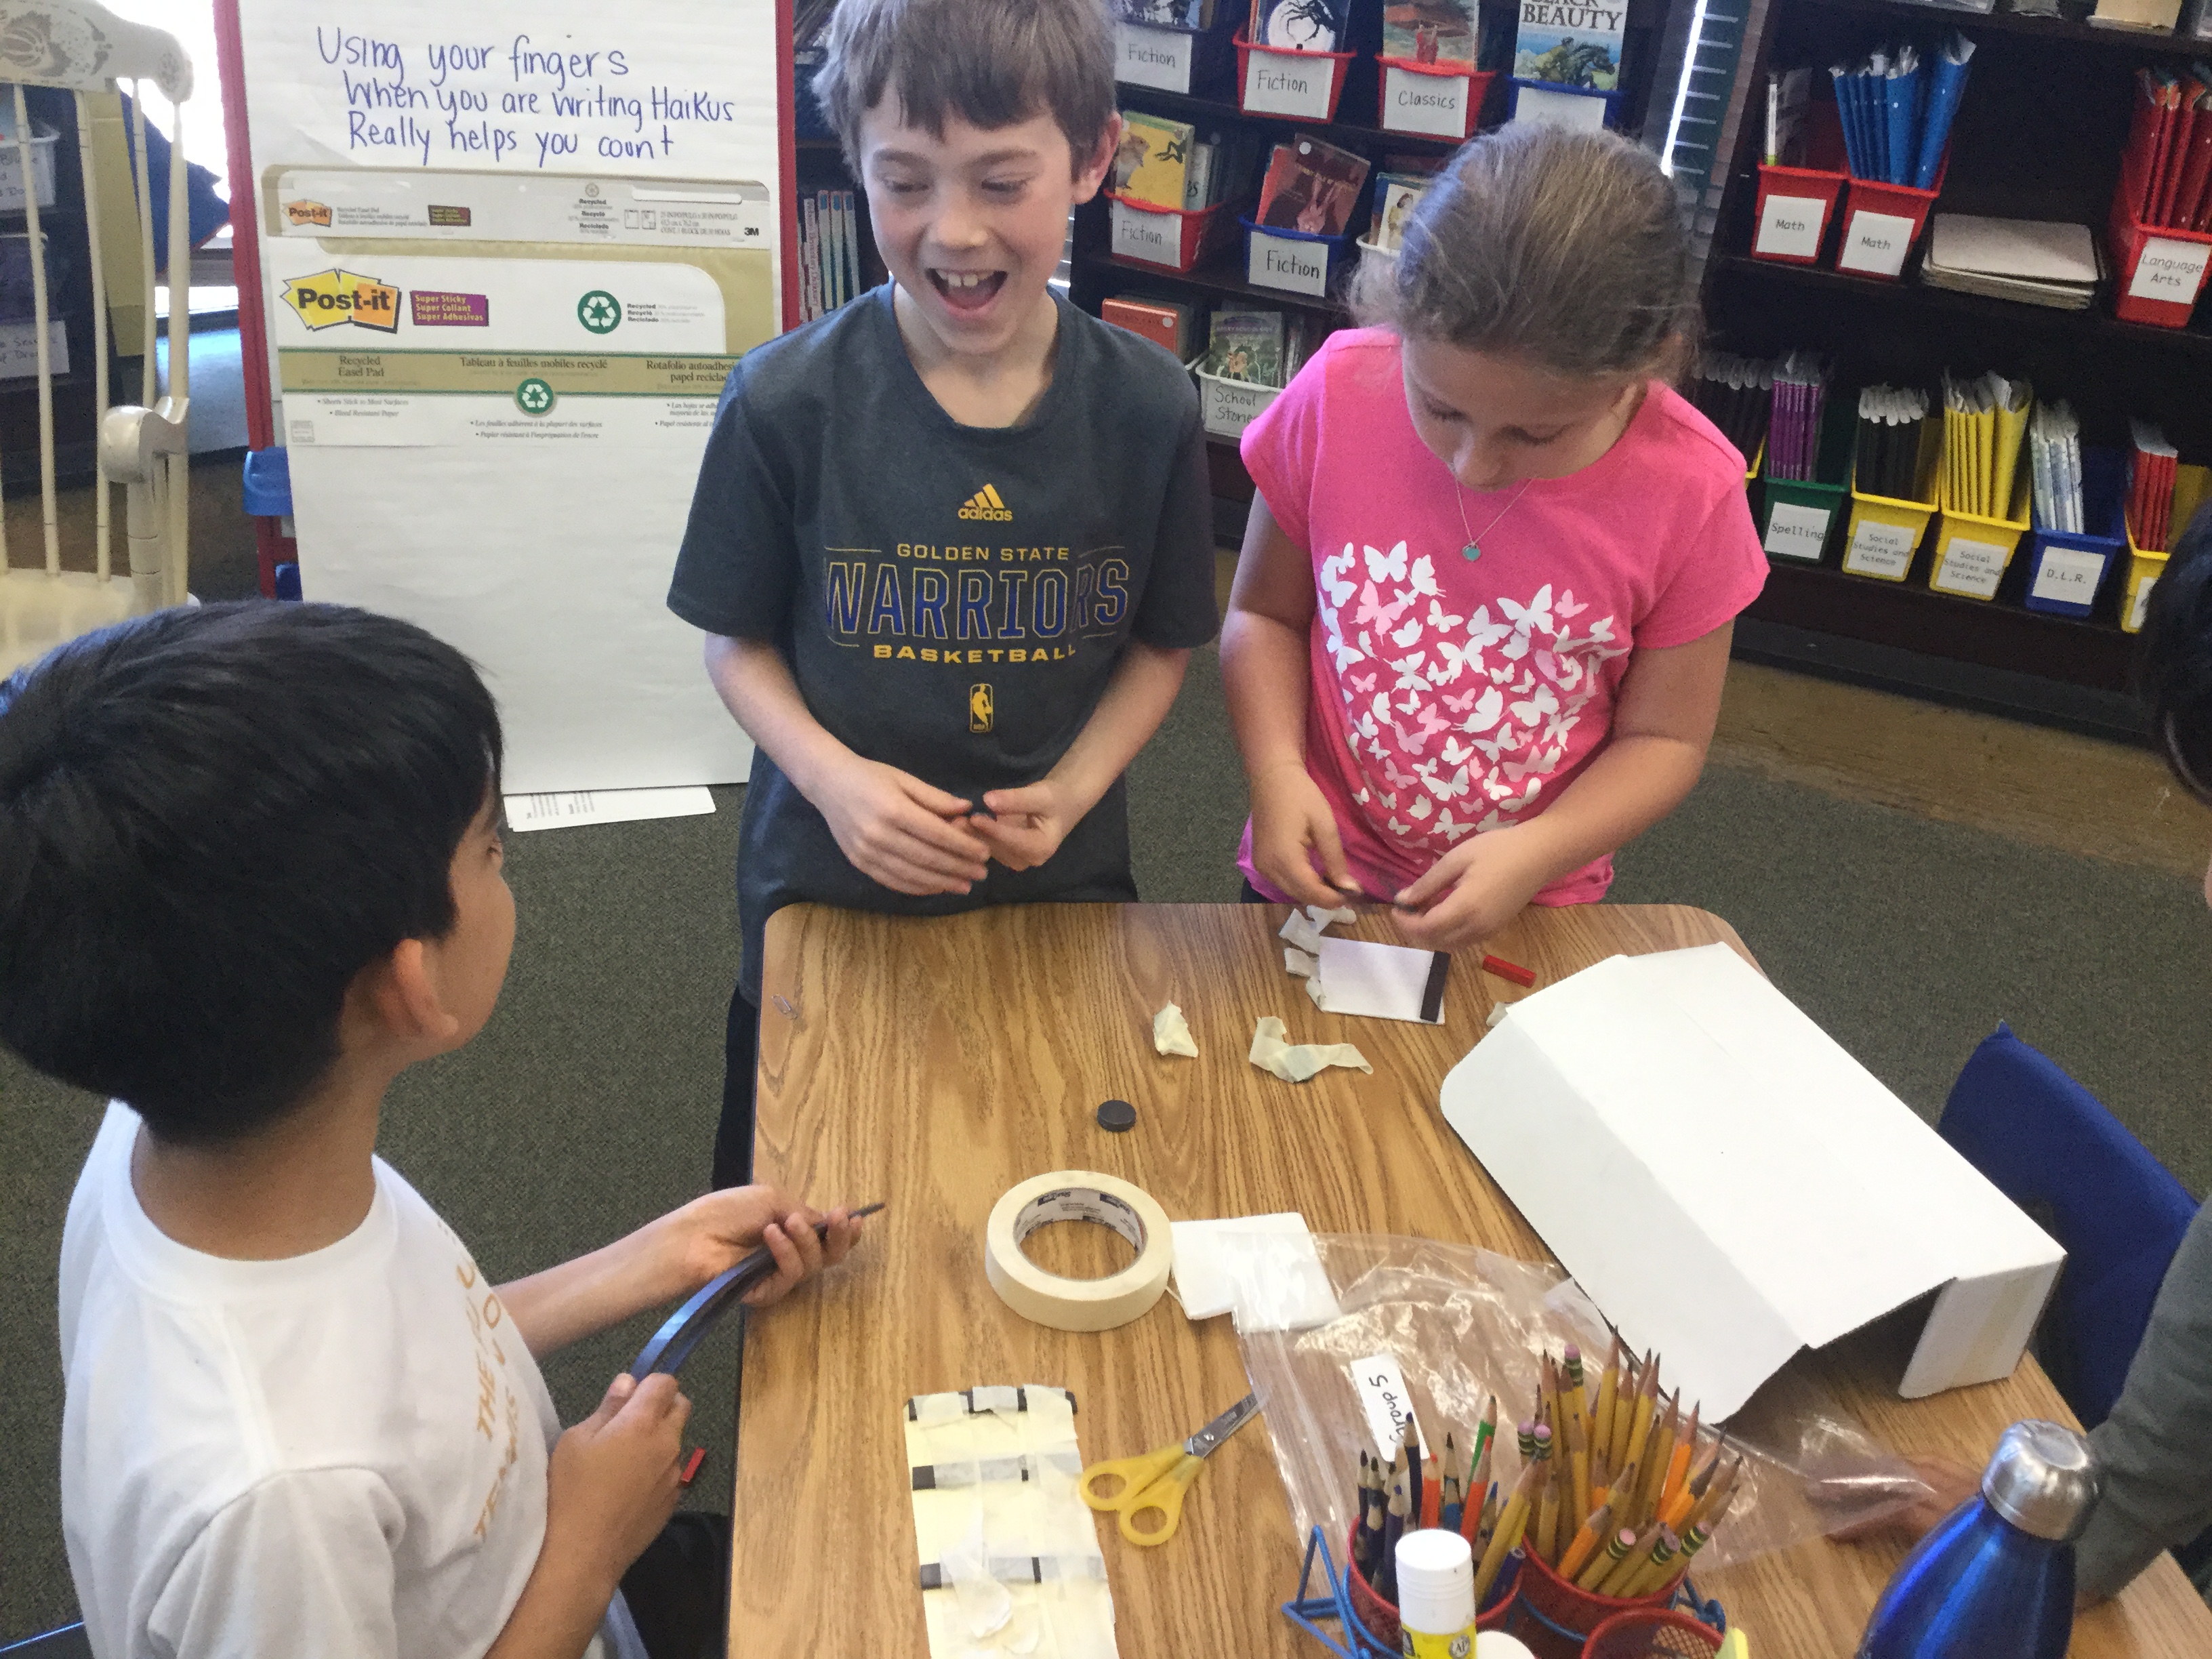
In my class, Weare doing a project called Rube Goldberg. Rube Goldberg is when you use simple machines and another object that is supposed to get a ball into a cup or something like that. There are six simple machines, A Pulley, Lever, Wheel and Axle, Wedge, Incline plain and, Screw.

I and my group are almost done with our sketch but the hard thing is about working in a group is that if you don’t have one team member there it’s hard to get everything done. I and my group are a little behind but as soon as the building starts I think we can catch up.

I think that this project is gonna be fun but at the same time, it will be a frustrating cause of how many times it will take to get it right. This project is to help with teamwork and knowing that not everything will happen on the first try.

Blog post 4/ Launching and graphing rocket 2

Blog post 4


We launched our rockets! Our first rocket went higher than the second one. My group was very disapointed and I was to. But at least it got off the launcher.


My group went first again. This time the parents were watching that also made me more mad because our parents couldn’t see our best work. At least the whole class there rocket off the launcher, that’s a big thing.


After the next day it was time to start graphing our rocket we basicly did the same thing as last time we added our hights together and then divied by 3 whitch got us to 20 then we worked with this special craffing paper and it turns out we got 67 meters. Not to bad.

Blog post 3/ designing and building rocket 2

Blog post 3


We are building our second Rocket. The promblem was that we can only change one thing from  our old rocket, but we are building the rocket from scratch. We decided to make our fin trigal shape instead of parrella.


After we planned out our Rocket it was time to build. Me and one of my team mebers were building the nose cone and one of my other team mebers were doing the fins. 


After we had everything ready it was time to hot glue. First we hot glued the nose cone then the fins and we secured both with tape. As a little decoration we decorated it with black and orange to match hallween.

Blog Post #2- launching and graphing Rocket 1

Rocket Blog Post


We did our launch!!!! It was so much fun. All our rocket went so high. Ours went very high, it went 38 metters. I got to be the launcher and the rocket placer. This is my rocket launch story.


We did our rocket launch on the field, the launcher was made out of a bicycle pump and a pvc pipe. When we got on to the field and we were getting set up for the first launch, which was my group. One of my group mebers was counting down 10 9 8 7 I was so nervous.


3 2 1 the rocket flies up so high at least it looks like it did. Everyone went wow, cause it was our first launch and also we went first but on everyones we all said wow on everyones. 


It was the next day after launching it was time to graph which means that we were gonna find out how high our rocket went next we chose the most reasonable hight and then we graphed it and it turns our rocket went 38 meters and we got second place which ‘m pretty happy about.

1-Design/Build Rocket 1

Rocket blog post


We are building rockets, then we are going to launch them on this special launcher. My favorite part about the designing process was making the inspiration board because we got to add glitter and got to do a lot of fun research like Newton’s three laws, diagrams and pictures of rockets. My team is called the astro rockets, I actullay like that name.


My favorite part about building the rocket is making the fins because it was fun to choose the number of fins and the sizes, I also like to hot glue them on our rocket, I love hot glue!


 We built our rocket in a thick way and we used contruction paper we also used contruction tape so it could be very secured. For our Nose Cone we had to use this special technique and then cover it with tape then hot glue it to the rocket. Then we add our fins with hot glue and also add so tape so it could be extra stable.

Final Blog Post

Final Plant Blog Post


This is our final blog post! The sad part is both of our plants are dead so we had to chuck it in the garbage can.


Our controlled that it used to be the colors for it was green, brown, yellow and White. Our highest is 12 cm and the smallest is 4 cm. The texture of is smooth and bubby on the leafs. In our controlled there are 3 seed pods. I thought that there would be 2 seeds because of the growth. I thought they would look not big not small but media.


Our manipulated is dead and we learned a lesson sugar water doesn’t work. Our colors for our manipulated purple, light green, green and yellow. Our high is 7 in a half and the smallest is 3 cm. It was very smooth. It had 5 seed pods. I thought it would have 3 seeds because of the color and height.


   Pollination is when one flowers pollen touches another flowers pollen it creates a seed. I manipulated my water for one of my plants instead of really water we used sugar water and it didn’t work. A stems job is to bring the water from the roots to the leafs.

Plant blog Post day 2

Plant Blog Post Day 2


My group and I are doing plants. We are looking at the sizes, colors, measurement all that stuff. We have two plants one is the controlled and that is the one that has soil, air, sunlight and water. But we also have a manipulated one that is has soil, air, sunlight, but instead of real water we used sugar water! For our controlled we are looking at observations like the colors are green, yellow and purple and some brown. The highest is 8 in a half cm and the smallest is 3cm. Our plants are dying and it is making less leaves less flowers change of color like I said brown where the leaves are supposed be. Since the start I think the growth is getting better then the first day.


Our manipulated is also dying. Our colors are purple dark green green brown from the dying. Our measurement for the big one is 7cm and for our small one it is 2cm. I think the growth is very different because the smallest right now is what it was on the third day. So it grows pretty fast.


I think the leaves are dying because we are adding to much water for both of them and it is to munch for it to absorb.

These are our plants.


Plant Blog day 1

Plant Blog Post day 1

My partners and I are doing plant observation and our experiment is sugar water and we are seeing if the color changes or my partners think it will grow higher than normal water I agree our control has air, soil, fertilizer, seeds, water and light. My manipulated is that we are using sugar water in stand of normal water.


The controlled has very light colors like light green light purple and normal green. And the highest is 6 cm and the lass is 2 in a half cm. And it is very smooth. Our manipulated has flowers and I think it is better than our controlled isn’t that crazy! Our height for our manipulated is 6 cm and the smallest is 2 in a half cm. our colors are yellow for the flowers green for the leaves and a little purple down at the stem. I think that look and growth will change the manipulated. and controlled it is direction to the light cause it is moving toward the sunlight out the window.

maglev Day 2

Maglev Day 2


My group used 2 small strips magnets for the train. For the track we used 2 on the side and then we put 6 more on the top to increase the magnetic field so the train will levitate. We had to make the train and the track were north and north or south and south they will repel and that is what the train and the track. At first it was tipping over put then we added more increases to the track magnetic field.


our car failed at first because it was not moving but levitating. The car wasn’t moving and it would just fall when you give it a push. We failed a lot and we keep on trying new things.


I learned how hard and frustrating to design and you are getting mad that your idea on the paper isn’t working. It is hard to work with a partner because you fight a lot.