Category Archives: Uncategorized

Final Maglev Reflection

By:Peyton schwadron

Group members: Eden, Kyle, Kabir

Our first design for our track was five strip magnets and two ring magnets. We put the ring magnets on the sides off the track. One of the ring magnets attracted the car the other repealed the car. All the magnets were horizontal so we hoped the car would go across.

One problem we faced was that our car was not floating high enough so we couldn’t get it across the track.The way we solved our problem was that we had to adjust the magnets and make the magnets on the track and on the car matching so it would float higher and go across the track.

Our final design was four strip magnets.Two small strip magnets were for the car and two bigger strip magnets were for the track. All of the magnets are horizontal so the car would go across.

When we were building the car and track I felt frustrated because we couldn’t get the car to float high enough so it didn’t go across the track. I also felt kind of happy because when we were done we got it to float really high and got a lot of marbles in the cup.

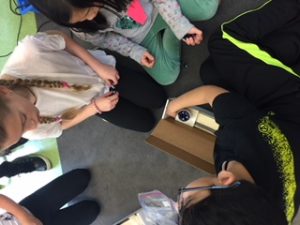
Maglev Reflection

By: Kabir    

Members: Peyton,Kyle,Eden

We taped 5 long strip magnets to the track we put the magnets horizontally. For the car we cut a short strip magnet into 4 pieces and put them in the corners and put another short strip magnet in the middle of the styrofoam train.

We faced the problem that the train and the track where not a mirror image so we had to change both of them to make them a mirror image so the car floated higher.

Our final design was two long strip magnets in the corners for the maglev track and for the car we had two short.

A feeling that I felt was frustrated because the train and the track weren’t working. It was not working and when it  finally worked excited and very happy when it was done.


Maglev reflection group #2

Maglev Reflection


By: Noah

Group members: Jake, Agam and Noah

Our first design for the track was with 6 ring magnets, 2 strip magnets,  two north & south magnets and tape. Our first design for the car had 4 ring magnets diagonal from each other we had 2 strip magnets on each side. On the car we had two ring magnets on each end of the car we also had 2 north and south magnets on each side of track.

We had many problems with our car. One of the main problems we had was, we could not get the car to levitate we tried flipping the car we tried doing different plans but we still did not get it to levitate. The way we got it to work was we found out we needed more magnets. By adding more magnets it made the car levitate and work.

Our final design was with two strip magnets on each side of the box and our vehicle had two little strip magnets on each side. We got it to levitate and  go back and forth. The design worked because we had a mirror image on the track and the car. In our previous design we did not have a mirror image. We were only able to hold  13 marbles on the train because we forgot to tape our cup to our vehicle.

The way I felt throughout the design was worried because, we could not get the vehicle to levitate.  I was worried that we would not have enough time.  On the last day we finally got it to work and we were really happy because all of us thought it was not going to work.


Maglev Reflection

Final Design Process Reflection

By:Eddie

Team Members:  Sofia H and Ahanu

My team’s first design for the track was 10 disc magnets, 1 big strip magnet and 1 ring magnet. For the train we taped the ring magnet in the middle of the train with the bottom of the magnet facing north. On the track we put the big strip magnet in the middle of the track and the magnet was facing south. We put the 10 disc magnets on top of the big strip magnet so they can attract.

The problem for our team was that the train kept flipping over and attracting to the track. We improved it by taking the disc magnets off the track and flipping the big bar magnet over so the top of the magnet was facing north, that made it to float but it didn’t make it to go across.

The final design my team made was we put two small strip magnets facing north on the train and two big strip magnets also facing north on the track. We put them in the exact same place but two magnets were on the train and two were on the track just like there was a mirror in between the train and the track.

My feelings for when my team and I were making the Maglev train was angry that it kept flipping over and nervous that we were not going to finish in time.

Maglev Train

Final Design Process Reflection

Name: Sofia S

Group members: Me, Brady, Sammy

My group first started off with 4 disc magnets on the bottom of the car. Two of each disc magnets were on the side of the car. There were 20 ring magnets on the track. The ring magnets were lined up with 10 ring magnets on one side, and 10 ring magnets on the other side of the track.   

A problem my group faced was we had different types of magnets on our car and our track. Therefore,  we knew we had to change our magnets to be the same if we wanted the car to float.

Our final design had 2 strip magnets on the car and the on the track. It worked because we had the same magnets on the car and the track. We also made sure that the magnets lined up, and they did! But one thing that was off is the car would sometimes tilt, but then we fixed that by rearranging the magnets. We also rearranged it many times, but then we finally fixed it.                                                                                                                                           

We felt proud that we got the car to float, and then  again when we put marbles in a cup on the car, it worked! That made us feel really proud. We are very happy our project worked although there were a few mistakes. Put what made it fun was how much work we did, that project was really fun and it was all worth it in the end. I hope we do a new fun project like this one again.


Maglev Reflection

Final Maglev Design Process Reflection

By: Sammy

Team Members: Brady, Sofia S.

Our first design was thirteen ring magnets on the track and on the car we had five disc magnets. Picture three sets of five magnets similar to five dots on a dice. Picture this on the bottom of the car five disc magnets similar to five dots on a dice.

One problem our group faced was the magnets kept attracting. The magnets kept attracting because the sides were attracting. The way we solved the problem was we made sure the magnets lined up.

Our final design was to lay two strip magnets on the edge of the box. Picture this on the track we layed two strip magnets on the edge of the box. Our car looked the same but with two short strip magnets on the edge of the car instead of two long strip magnets.

One of the thoughts I had doing this project was I was determined to make the car float  after seven tries we got it right. Another thought I had was I thought the project would be easier because  all we had to do was to make a foam square repel and glide across a track.


Maglev Reflection #1

Final Design Process Reflection

by: Jordan 

Group Members: Milo, and Dylan

Our train had 2 long strip magnets 4 north and south pole magnets and masking tape we put the long strip magnets at the side of the inside part of the box and we put tape under the long strip magnets and taped the north and south magnets over the long strip magnets.

The first problem with our train was it wouldn’t levitate high enough and our groups solution was to take away the north and south magnets and we added five long strip magnets on each side of the track and it levitated high enough.

Our last design was putting five long strip on each end and on the car we put 2 small strip magnets we also put tape under the the small strip magnets so the magnets would stick. We also taped the two cups with the tape so the cups would not slip off the train.

One of my thoughts going through this process was that we are going to do it to make the train levitate and one of my feelings was I was very excited. I was excited because it was cool to have the opportunity to do this.    

Maglev Project

Final Design Process Reflection

By: Luke Iasiello

Group Members: Emma, Ryan  

On our first design we used 4 magnet strips, 7 ring magnets, 7 disks, 1 long strip magnet and last one red magnet. For the track we used two horizontal long magnets, we also used seven ring magnets along the edges of the track. We also used the red magnet on one side of the track.  For the vehicle, we used two small strip magnets. We placed one magnet on the left side of the vehicle and one other magnet on the right side of the vehicle.

 One problem we had was that the magnets were  not repelling. We fixed this problem by testing the sides and seeing if they repel to the other magnets.   

Our final vehicle worked because we put 2 of the long strip magnet on each side of the bottom of the box and put 2 little strip magnets on each side of the vehicle faced the right side to repel to the other magnets on the bottom.

I had trouble when my plan did not work and I was mad.

Thankfulness

Thankfulness  

I’m grateful for my mom because she spends a lot of time with me, my mom cares about me and she is there when I need her.

The first reason I’m grateful for my mom is she spends a lot of time with me. For example, when I’m lonely she always know how to make me happy. My mom and I play Monopoly together and we also play the game of Life.

In addition, I’m grateful for my mom because she cares about me. For instance, she helps me hard things like homework and more.

 Last but not least, I’m grateful for is my mom because she is there when I need her. In particular, when I get hurt she always will help me up and when something is wrong she always knows how to cheer me up.

To conclude, I always know my mom will has my back.

–Emma Steinberg November 2017

Thankfulness

Is there someone you’re thankful for? I am grateful for my dad because he coaches my hockey team, he helps me and takes care of me.

The first reason I am grateful for my dad is that he coaches my hockey team. For example, my dad is a fair coach because he makes sure everyone gets a turn on the ice.

The second reason I am grateful for my dad is that he helps me. For instance, he helps me with lego sets by opening the box and sorting out the pieces.

The third reason I am grateful for my dad is that he takes care of me. In particular, he gives me a band-aid when i’m bleeding and he encourages me to win.

To conclude, all these things are meaningful to me because my dad is like a superhero.


–Samuel Barnea  November 2017